Showing posts with label Blucher. Show all posts

Thursday, May 13, 2021

Along the Danube Scenario for Blucher

After over a year since our last go with the Blucher rules, we finally tried another game. 4 of us played a modified version of the "Along the Danube" scenario, which is a free download on the Honour website here: link. The scenario was "modified" as some of the terrain was reduced in size due to what we had available. My 28mm figures are on 60mm frontage bases, which is 20% smaller than the 3" frontage bases recommended by the rules. This means we could play the scenario on an area 20% smaller than the 6' x 4' that the scenario called for, which fit on the kitchen table we were playing on.

We used rosters for the game to keep track of elan losses. It seemed to take longer as you have to repeatedly look up your unit's strength during the game for determining how many dice it gets for firing & melee, but eliminated some clutter on the table. 


Above, both sides deployed using cards. The cards were homemade. The upside down coffee cup is used for the momentum dice, which the opposing side rolls and keeps track of for the phasing side and keeps the roll concealed.


Both sides have units come into sight and the cards are replaced with miniatures. Infantry Brigades are represented by 2 bases of miniatures that measure 60mm x 30mm. When an infantry unit becomes "prepared" (in square and/or taking advantage of local cover) according to the rules, we simply turn the rear stand around to face the opposite direction to represent a "prepared" infantry unit. Cavalry & artillery brigades are represented by a single stand each.


The French cavalry corps sweeps around the Austrian right, initially using reserve movement, but countered by heavy cavalry from the Austrian Reserve Korps (lower left in above photo).


Overall view of the battlefield.


The French cavalry are forced back on the left.


In the center, the French are moving forward with the intent of getting into shooting range.


A firefight has broken out on the French right flank.


The French cavalry on the left flank has gotten the worst of it so far and fallen back. A firefight is developing on the right of the photo and would prove costly for the French.


Meanwhile, the Austrian left flank has been devastated by shooting.


The French left keeps slowly dwindling down due to losses. The French often found themselves without enough momentum to withdraw or turn individual units around that had retreated from melee, giving the Austrians opportunity to hit them in the flank/rear or destroy them when they were at 1 elan strength.


The Austrian left flank is basically gone and the French infantry are crossing the stream. A French cavalry unit has seized the objective marker between the two small fields.


However, French losses on their left flank & center were catastrophic, as the Austrian center & right hold firm. The battle is won by the Austrians. The small boxes in the upper part of the photo were dice boxes.

We still had a few problems with doing everything correctly with the rules, but it was still an interesting game. Units in Blucher wear down rather than occasional destruction as in other rules. NOTE: The miniatures are based for DBN, HFG, and DBA-HX, as are the movement sticks, etc. They are all perfectly usable for Blucher.

We may try this scenario again using HFG.


Thursday, March 26, 2020

Gaming in the Age of Corona

Last week, Bob & I were able to get in a game the day before our governor imposed a "shelter-in-place/quarantine" order due to the Corona Virus. We set up the "Along the Danube" scenario for Blucher, French vs Austrians. Below are some shots from our game.


 The French army deployed for the game. 


 The Austrian army deployed. It may not be clear in the photo, but the group on the left is on top of a large hill. The red disks in the background are objective markers. French control of both would cause the game to end immediately with a French victory.


 Another view of the Austrians deployed on the central hill. Bob outlined the crest of the hill with chalk.


 An Austrian Grenz brigade deployed in the far wood top left, and a view of the French far-left flank in the foreground (the wooden stick was the left flank table boundary). Note the labels on each brigade. We marked off losses directly on the labels using pens. However during the game, a better way of tracking casualties became evident that we will try in the future, namely casualty counters or markers instead of using pencil/marker to track casualties.


 An Austrian infantry corps defending behind a stream.


 The French slowly advance. The main error in our game was not using reserve movement. With infantry moving at 2 base widths maximum every turn, you can see in the photo above how many turns it will take to close with the enemy at the other side of the photo. If the French had used reserve movement, they could have advanced up to 12 base widths, or nearly all the way to the other side of the photo in a single move. A lesson learned. Reserve movement strategy is something players need to strategize about when deploying their troops in Blucher.


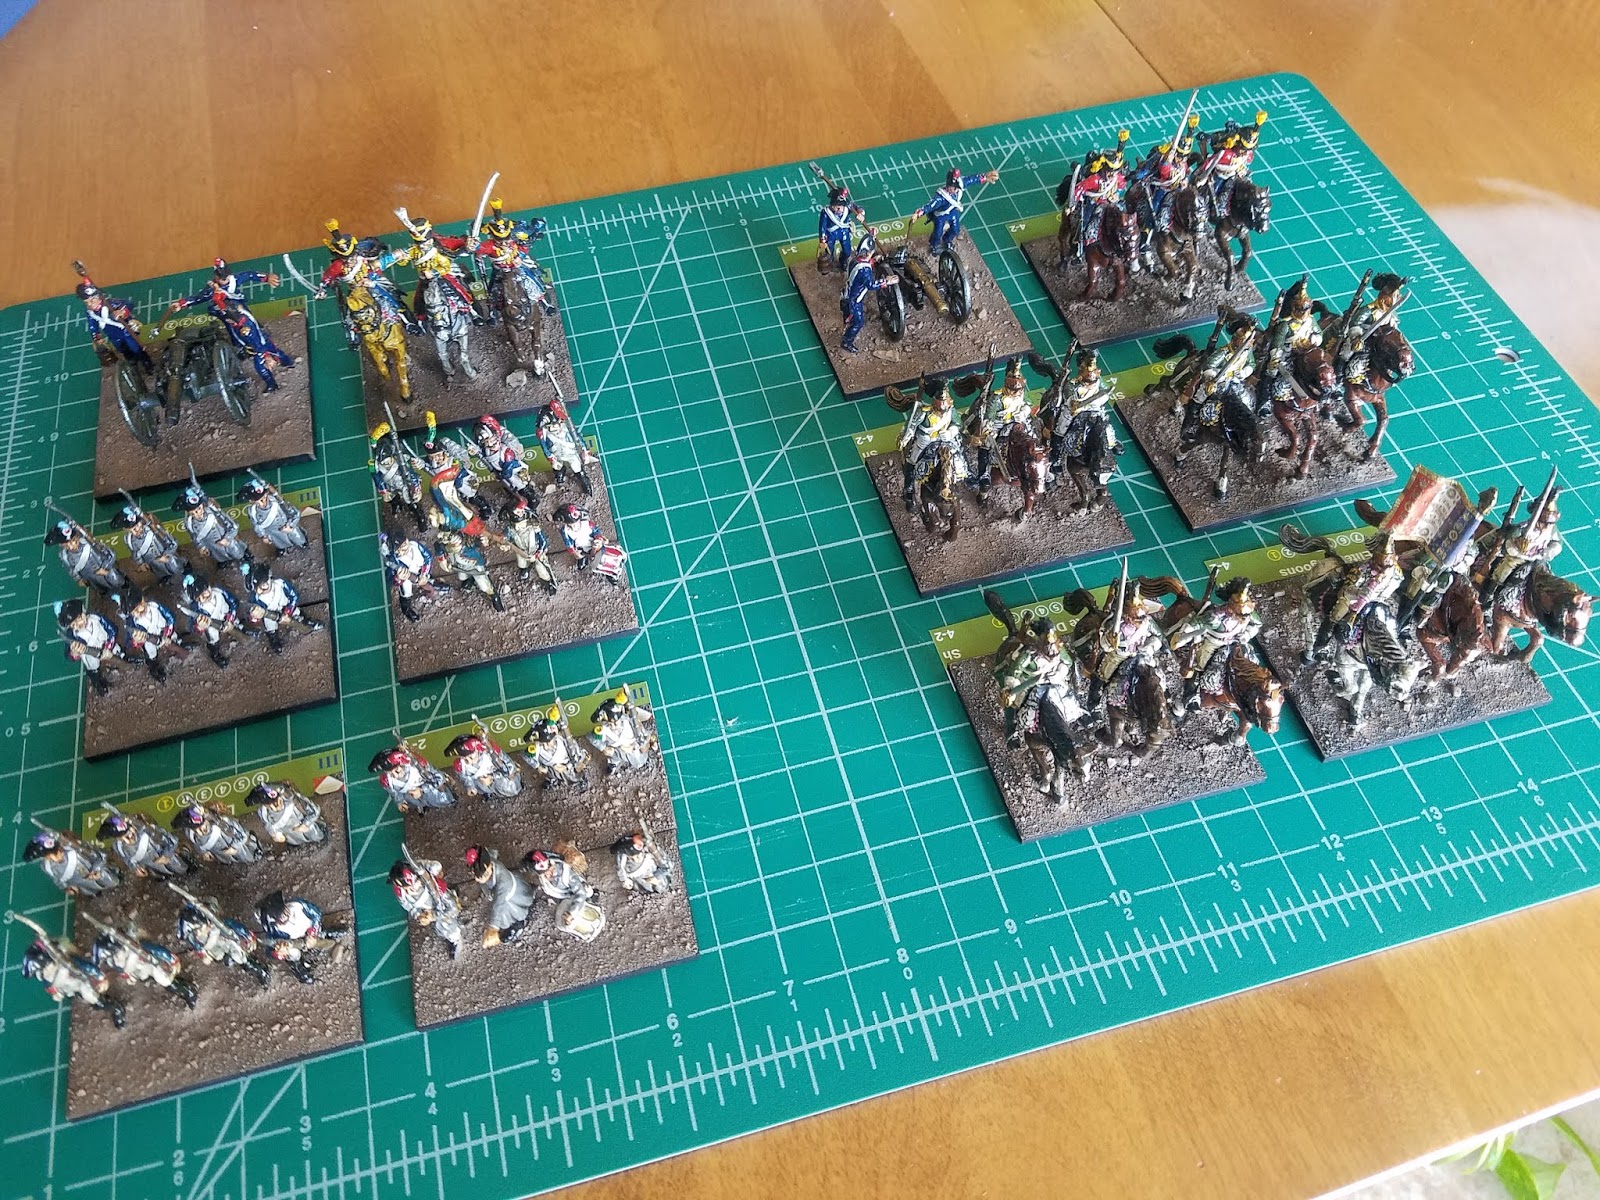
 Artillery fire: A French battery fires on an Austrian infantry brigade. I made the yellow template to assist with determining the firing unit center and 45 degree shooting/charging angles.


 Another view of the battle.


 The Grenzers are hiding in the woods from French Hussars & artillery.


 The French "Marechal d' Empire" urging his troops forward.


 The French slowly getting closer.


French infantry & cavalry. The infantry has a better look in two ranks of stands. If we want to do a larger battle, like Austerlitz, we can use a single stand of infantry per brigade if we do not have enough troops using 2 stands.

Unfortunately, the game turned into an artillery duel. The Austrians came off the worst, forced to retiring two infantry brigades whose elan had dropped to 1 each by artillery hits. Retiring a unit before all of it's elan is gone is a way of avoiding the unit being counted as destroyed for victory purposes. By the end of our game, nothing decisive happened. Most of the French guns had nearly expended their ammo, while the Austrian guns had a couple rounds/gun left. We will try it again after the quarantine is lifted.

Friday, March 13, 2020

Preparing to Play Blucher

My friend Bob & I are planning to play the introductory scenario for Blucher called "Across the Danube." I have been preparing some units for the game. The last time we played (over a year ago) we used a die to track losses in the game for each unit. I wondered at the time if there weren't a better way of tracking casualties & wanted to avoid using a roster system, if possible.

I came up with making labels for the Blucher units using MS-Excel that would affix at the rear of the stands. The labels are similar to the unit cards used in Blucher, and has all the information needed to play the game. I made the labels an olive green color so they would blend into the game-mat we would be using. The labels contain the nationality, unit name, traits, corps ID, elan, and movement rates on the label. Elan losses would be marked on the label with a pencil. We will see how this works.

I also decided we would use 2 stands of infantry to represent an infantry brigade instead of one. This meant I would need more stands of infantry to make brigades, but the units would have a better appearance. I instead of using a marker to indicate if a unit is "prepared" or not (prepared includes forming square), the rear stand of a 2 stand infantry brigade could simply be turned around facing the opposite direction like a unit in all-around defense to indicate "prepared."


Thursday, March 5, 2020

New Recruits

I haven't posted in awhile because not much has been happening in my hobby. However, I just received some of my Casting Room 28mm 1805 Russians that I intend to use for Blucher, HFG (Horse, Foot, & Guns), and DBN. My friend Al Hulton painted these, and did a wonderful job. I just finished mounting them on 60mm X 30mm MDF bases, the artillery on 60mm X 60mm.

 Above are the Russians that Al has completed for me so far. 4 stands of artillery and 11 stands of infantry.


 Russian foot artillery. Licorne guns.


 Above are the Kursk Regiment (foreground), and the Old Ingermanland Regiment (Second row). Al painted the pompoms with the various battalion distinctives.


 Above is the Perm Regiment.


 Above is the Pskov Regiment (2 left stands) and the Archangel Regiment (2 right stands).


 A single stand of the Pavlovsk Grenadier Regiment. 4 more figures are pending.


 Rear view of the Pavlovsk.


Very impressive indeed. I have about 20 more figures pending.

I still need to terrain the bases (white glue, sand, paint, & flock) and add flags & poles. I have to obtain flags for the standard bearers from GMB Designs. 

I plan to use 2 bases of infantry per brigade for Blucher (which I hope will make the unit more aesthetically pleasing), while HFG & DBN use a single base for infantry brigades (though I suppose I could use 2 for them as well). I have also made labels for each brigade for Blucher, since that game requires maintaining a roster.

Saturday, December 15, 2018

Bavaria 1805 - A 28mm Blucher AAR

Recently, my friends & I gathered to play a large 6-player game of Blucher in 28mm. The scenario was a fictional encounter in Bavaria. The Austrians had 3 corps that were trying to break out north from Ulm into the French rear. Meanwhile the French had 3 corps, and were trying to contain the Austrians until the Grande Armee could complete it's encirclement of Austrian General Mack's army. To spice up the scenario & even the points, a flying column of Russians appeared to reinforce the Austrians.

Below is the order of battle we used for our game:

Austrian Army (411 pts, breakpoint 11):

Riesch's Corps, Poor, 1D6+4 activations.
8 x Veteran Line Infantry
1 x Veteran Grenz
1 x Hussars
1 x Uhlans
1 x Foot Artillery

Werneck's Corps, Poor, 1D6+4 activations.
8 x Veteran Line Infantry
1 x Veteran Grenz
1 x Hussars
1 x Uhlans
1 x Foot Artillery

Kienmayer's Reserve Corps, Hero, Inspiring, 1D6+7
4 x Hungarian Line (Impetuous)
4 x Grenadiers
1 x Curassiers
1 x Dragoons
1 x Foot Battery
1 x Horse Battery

French Army (453 pts, breakpoint 11):

Soult's Corps, Hero, Inspiring, 1D6+6
8 x Ligne/Legere Infantry
2 x Foot Batteries
2 x Lt Cavalry

Lannes' Corps, Inspiring, 1D6+8
5 x Ligne/Legere Infantry
3 x Grenadiers (Oudinot's Division)
1 x Heavy Battery
2 x Lt Cavalry

Ney's Corps, Inspiring, 1D6+9
8 x Ligne/Legere Infantry
2 x Foot Dragoons (Ligne w/o traits)
1 x Foot Battery
1 x Horse Battery
2 x Dragoons

Russian Flying Column (64 pts, breakpoint 2):

Miloradovich, Steadfast, 1D6+4
2 x Jagers
2 x Cossacks
1 x Chevalier Guard (Elite Cavalry)
1 x Dragoons
1 x Horse Battery

We again used a variant from the Honour Blucher forum for generating momentum by grading the corps commanders. The player would roll a die for their commander and add a factor unique for that commander, which would indicate the number of activations the player had for his corps. The factor is ghenerated from a spreadsheet which weights the number and quality of the command and the commander's historical ability. We did not use Corps or CinC activations as in the regular Blucher rules, as all activations are individual. The system is simple, fast, & effective. 

Pictures of the battle below:


The French are to the left, the Austrians on the right. Soult (near) & Lannes' corps (center) coming out of the woods and deploy. Ney's corps is top/center. The Austrians have approached, with all 3 Austrian corps leaving reserves behind (cards). Kienmayer's reserve corps is in the center.

Just prior to Kienmayer & Lannes closing into action. 


Kienmayer has inflicted heavy losses on Lannes (left center). The Russian flying column has appeared as reinforcements (far right). 


 The Russians deploy.


The end of the battle.

We played about 12 turns, with the Austrians holding an advantage in inflicting casualties & forcing retirements. Both sides had numerous brigades retire due to casualties, but neither army was near the breakpoint. 

Most of my friends were new to Blucher, but learned the game very quickly. One set of situations that arose during the game causing discomfort for some was that in Blucher when infantry is required to retreat due to a combat, it does so unless it is fighting any cavalry, in which case the cavalry retreats instead of the infantry. Sam Mustafa has argued in the Honour Forum that he believes infantry in real life would either stand or break to cavalry, and not retreat.

Some details about our game:

Figures are 28mm, mostly Victrix & Perry plastic, & Perry, Brigade Games, & Castingroom miniatures metals.

Bases are 60mm wide (DBN, HFG compatible).

Blucher cards - homemade.

Table dimensions: 6' x 5.'

Fatigue/Ammo recording: used small (10mm) dice to mark fatigue & ammo level next to stands.

Saturday, December 8, 2018

Battle of Elchingen 1805, a Blucher AAR

My friend Bob & I had a chance to play a small Napoleonic game of Blucher on my dining-room table. We used the 1805 battle of Elchingen as a scenario. The order of battle I used was adapted from a Napoleon's Battles scenario I obtained here: Link. There is also an excellent account of the battle on the Obscure Battles Blog here: Link. The order of battle we used is shown below:

French At Start
Marshal Ney, excellent, hero, (1D6)+5, (+8 starting on turn 7)
5 x Line/Legere brigades
1 x Lt Cavalry brigade
1 x Dragoon Brigade
1 x Foot Battery
1 x Horse Battery
Army Breakpoint: 3

Reinforcements Turn 7:
4 x Line/Legere brigades
Army Breakpoint: 4

Austrian At Start
General J. Riesch, poor, (1D6)+4
8 x Veteran Line brigades
1 x Cuirassier Brigade
1 x Lt Cavalry Brigade
1 x Foot Battery
Army Breakpoint: 4

Comments on the Order of Battle above: 

1. We used a modified momentum system for our Blucher game that I obtained from the Honour Forums Website. The system rates individual historical commanders and, based on the composition of their force and some built-in "friction," gives a variable on how many units that general can possibly activate in a turn. You simply roll a die at the beginning of your move and add the general's "plus" number to get the number of units you can activate for that turn. For example, on turn 1, Marshal Ney rolls a 2, adds the +5, and can therefore activate 7 individual units that turn. Corps & CinC activation's are not used as in regular Blucher. Overall, while this method doesn't have the uncertainty of knowing how much momentum a player has each turn as in the regular Blucher rules, however it is simpler, allows better commanders to consistently activate more units, and works better for a multi-player game. 

2. Due to the small number of guns available at this battle, I reduced the effectiveness of artillery for this scenario by halving the number of dice available. So an artillery unit had 6 shots of the following number of dice: 3,2,2,2,1,1.

3. In the actual battle, the Austrians had a few Grenadier battalions mixed in with their line infantry. However the line infantry was, by the time of this battle, in a somewhat demoralized state. Therefore, I opted to not give the Austrians any concentrated grenadier brigades, but raised the morale of the line to regular to take into account the presence of the grenadiers among them. Similarly, the Austrians had a Cuirassier Regiment split-up by squadrons among their infantry, a peculiar early war practice. For this game, the Cuirassiers were assumed to be concentrated into a single brigade.

The Battle:

Napoleon ordered Ney's Corps to cross to the north side of the Danube river to prevent the Austrians in Ulm from escaping French envelopment. The battle begins with the French having repaired the Danube bridge and crossing the river in force, while the Austrian covering force had already fallen back from the river. 


The above photo shows the start of the battle...snow covered the battlefield. Ney's corps is crossing the Danube on the right, while Riesch's Austrian corps is deployed on the ridge overlooking the valley between the villages of Ober & Unter Elchingen.


The French crossing the bridge. The infantry are Essex 28mm metal figures. The artillery is Victrix plastic. The troop stands are 60mm wide.


The Austrian infantry occupying Ober-Elchingen, supported by a battery of guns & Hussars to their right. The Austrian infantry is Victrix 28mm plastic, the guns and cavalry are Perry 28mm metal. The buildings are pre-painted from the Miniature Building Authority.


 Above, the Austrians have come down from the ridge towards the French in an attempt to keep them bottled up near the bridgehead. Historically, the Austrians stayed on the ridge and allowed the French to deploy opposite the entire ridge.


The French & Austrian artillery has fired, shown by the dice next to them, indicating how many shots they have left.


The Austrian player has activated the infantry in Ober-Elchingen to become a "garrison."


The above photo is several turns later. Malher's Division infantry has arrived and crossed the bridge, reinforcing the French (lover right). The Austrian infantry nearest Ober-Elchingen charged the French, and were generally repulsed. The Austrians in the right of the photo are still pressing the French, who will have to use creative movement to extricate some of their units. Generally, Marshal Ney was able to move most of what he wanted for much of the game.


A few turns later, the photo above shows the French have the upper hand, driving back the Austrians. The final tally was 3 Austrian units broken, 1 retired. No French units were lost or retired. One telling event was after the Austrian had launched another set of charges, the French won most of the melees, then poured volley fire into the Austrians in their next turn.

We may re-fight this scenario again using another set of rules, like HFG, DBN, or DBA-HX, & see how they compare.


Sunday, November 25, 2018

Small Napoleonic Armies: French Army Ready

My French Army for my Small Napoleonic Armies project is finally where I want it to be. My figure painter gave me 36 painted figures last month, though he still has another 36 or so to go. In the mean time, I found some Essex 28mm figures that I had purchased over 25 years ago and had completed some and started some. I decided to finish these (36 figures) and now my army is ready for some large scenarios.


Above is the army as it stands now. I have 27 stands of regular infantry (about 2/3 Victrix plastic, about 1/3 Essex metal). The Essex figures are in the center infantry group between 2 groups of Victrix. In the background are 2 stands of dismounted dragoons (Perry plastic) & 3 stands of Perry Line Grenadiers (metal). To the right are 8 stands of Perry plastic Dragoons & Hussars. In the foreground are 15 gunners & 3 guns (Victrix plastic) and 2 metal guns (Old Glory). The Marshals are Perry metal figures. All the figures are mounted on 60mm frontage stands, originally intended for the HFG (Horse, Foot, & Guns) rules. This scheme (with each stand = brigade/grand battery) will also work for the following rules: DBA-HX 3.0, DBN 2.1, Volley & Bayonet, Grande Armee, and the Blucher rules by Sam Mustafa. The single 4 figure stands of infantry may not look impressive as a brigade. However, I can double up the stands to make 8 figure brigades for smaller battles, and use single stands for larger battles. My French army still needs cuirassiers & chasseurs a cheval, so that is something to do for the future, along with the Imperial Guard. That is the plan for now, anyway.


Above, I also completed more Austrians, a stand each of Cuirassiers and Dragoons. The figures are Casting Room Miniatures in 28mm. They were fun to paint, as well, with a lot of nice detail. This now brings my Austrian army up to 16 stands of regular infantry, 3 grenzer, 4 artillery, 6 cavalry, 5 grenadier, and 4 stands of General officers. I have 1805-7 Russians waiting in the wings to do next.