On the Obscure Battles Blog, Jeff Berry has followed up his article on the Battle of Hohenlinden with an article on the famous battle earlier the same year that cemented Napoleon's hold on power, Marengo. While Marengo is not necessarily an "obscure" battle, Jeff Berry's take on it is. Another winning and very interesting article for Napoleonic fans. The link to the article is here: http://obscurebattles.blogspot.com/2020/11/marengo-1800.html
Monday, November 30, 2020
Tuesday, October 27, 2020
Obscure Battles: Hohenlinden 1800
The Obscure Battles website recently posted an article on the battle of Hohenlinden in 1800, which was faught between the French & Austrians. The French were commanded by Napoleon's rival, Jean Victor Moreau, who was a talented general. A very interesting article, as are all the articles on this website, detailing a battle that was very decisive yet not well publicized.
Read the article here: https://obscurebattles.blogspot.com/2020/06/hohenlinden-1800.html
Age of Napoleon Podcast
I ran across a podcast series called "The Age of Napoleon." It intends to cover the entire French Revolutionary & Napoleonic period. They have currently completed the Revolutionary Period and are up to 1803. I just listened to the ones covering the battles of Castiglione & Marengo. Another worthwhile thing to listen to while painting miniatures!
You can find it here: https://cms.megaphone.fm/channel/ADL5280986787
Wednesday, September 16, 2020
DBA 3.0 House Rules Index
If you play DBA 3.0. the Fanaticus Forum page is a great resource for gamers. One of the forum pages is titled "House Rules Index" which contains suggested house rules and discussions about them in a convenient index. "Stevie" (one of the forum members) updates this page periodically. Below is a link to the page:
Friday, August 21, 2020
DBA 24: Early Renaissance AAR
For our second game after the Corona Virus lock-down 5 months ago, we decided on a game of DBA 24. DBA 24 is a double sized game of DBA 3.0 with the following modifications:
- Armies are 24 elements each. Double all element counts in the army lists.
- CinC's are per the army list. Each army may also have one subordinate general from any element in the army list except expendables, artillery, horde, Lit, CWg, or CP.
- Command radius is 8 BW within either the CinC or Sub general.
- The CinC gets the +1 combat bonus, the sub general does not.
- The CinC counts as 2 elements lost, the sub general only one.
- Only one pip die is rolled for each army. Note: Players may want to maximize group moves, as you only have 1D6 of pips available.
- The battlefield is 50% larger across, but regular depth dimensions.
- The number of terrain pieces allowed is the same, though players may want to consider using terrain of the largest allowed dimensions if a lot of terrain is desired.
- Victory is when the opponent has lost 8 or more elements instead of 4.
Bob has 2 identical 24 element Early Renaissance armies, which we used for our DBA 24 game. We also used some experimental rules of our own for the early Renaissance period which modify the DBA 3.0 rules as follows:
- Psiloi can shoot in distant combat if they do not move: +2 vs foot, +1 vs mounted.
- LH can shoot if they don't move: +2 vs foot, +3 vs mounted.
- Arquebus shoots as 4Bw.
- 3-4Bd & 4Bw in the front rank of a pike column 2+ ranks deep can fall back to the rear rank of the column in a group move. They, as well as pikes can do this instead of being destroyed by a recoil result due to being in a 3+ element deep column.
- Artillery cannot move once deployed, and shoots every other turn.
The following is an account of our game using all the above mentioned modifications:

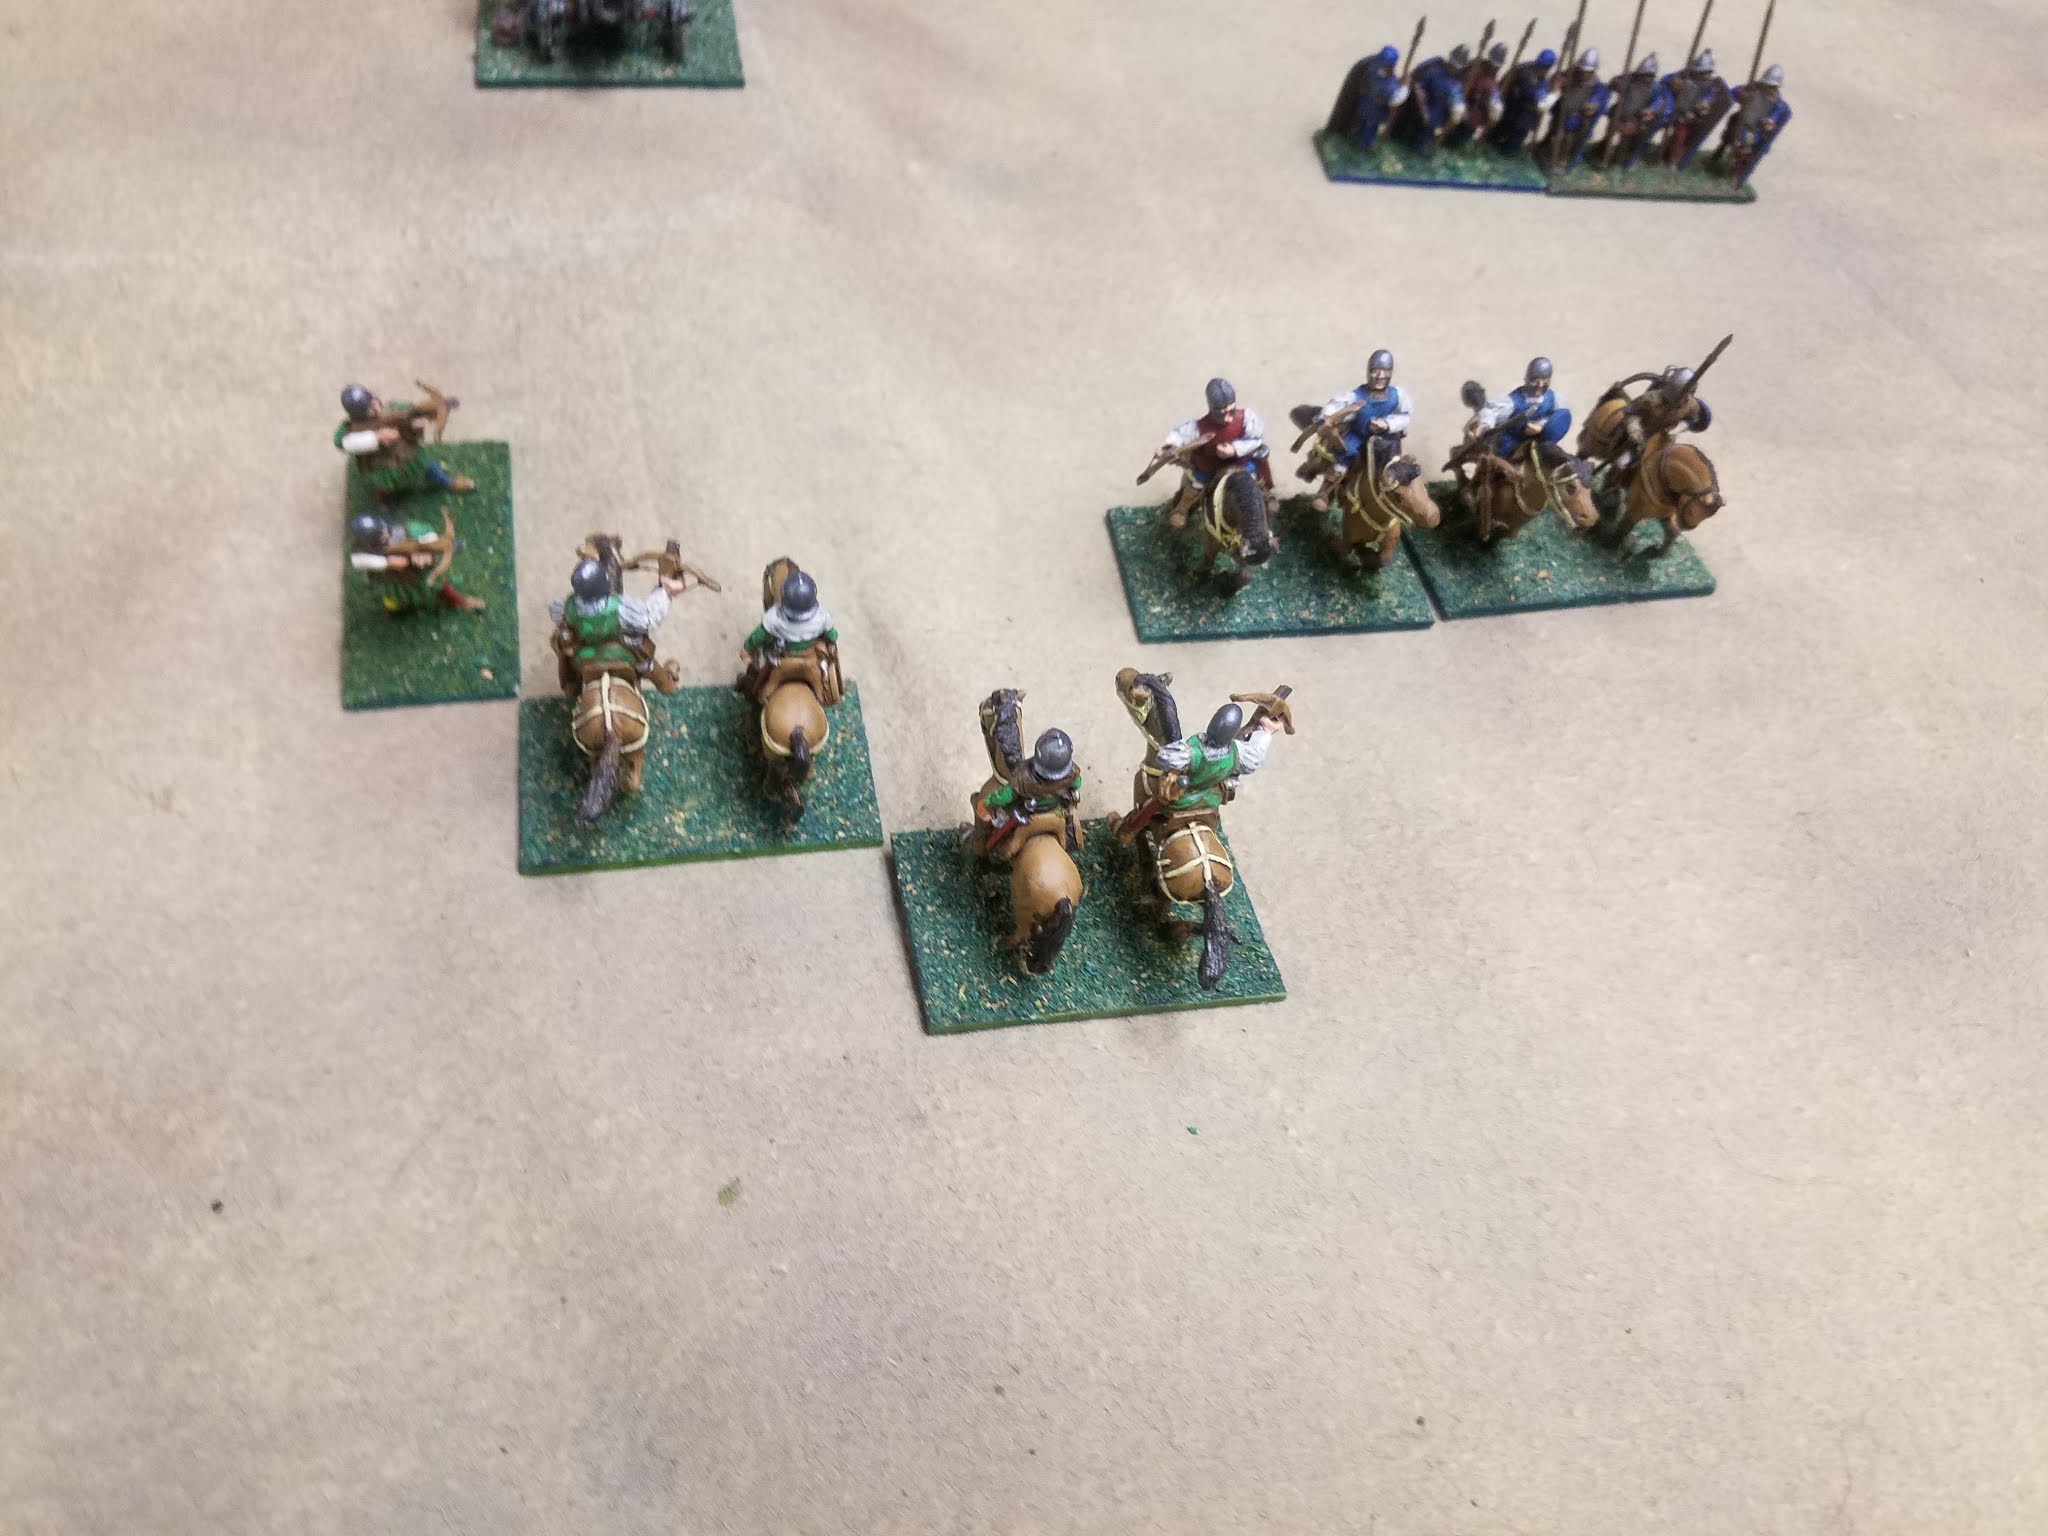
The mythical forces of Ostland (upper left) and Ruritania (lower right) deployed for battle. Both sides have placed their LH & some Ps on the left, while the Kn are on the right of the photo. Ruritania has also supported their Kn with 4Bw (Arquebus) & 4Sp.

The Ostland "Tercio" of 4Pk, 4Bd, & 4Bw.

The Ruritanian Tercio: Pk & Bd

The Ruritanians advance their Ps on their left flank, while attacking enemy Ps up the hill with Kn & Ps on their right flank.


The Ruritanian Kn & Ps on the far right on the hilltop have turned to face the Ostland left flank. The Ostland Gendarmes (Kn) have advanced forward towards their enemy counterparts. 2 of the Ostland Kn have recoiled from distant shooting.

A closer view of the recoiled Gendarmes.

The Ostland Kn recover from recoil and charge forward into the arquebus fire!

Ostland has lost another Ps on their right flank near the artillery. The Ruritanian LH charges the enemy LH with Ps in support. Ostland has lost a LH element. On the Ruritanian right, the Ostland Kn have destroyed a 4Bw, while having one of their Kn recoil again. The Ruritanian Kn from the hilltop are applying pressure on the far right.

A closer view of the far right flank.

On the Ruritanian left, both sides have lost 2 LH due to stationary LH & Ps distant shooting. The Ruritanian artillery has destroyed a Ostland 4Bw that moved towards it from the tercio (not shown). On the right, Ruritania has lost both 4Bw and a 4Sp, while Ostland lost a Kn. The Ruritanian Kn are closing in.
Close-up of the left flank action.

Close-up of the right flank action. The CinC's of both armies are the elements with the large flags.
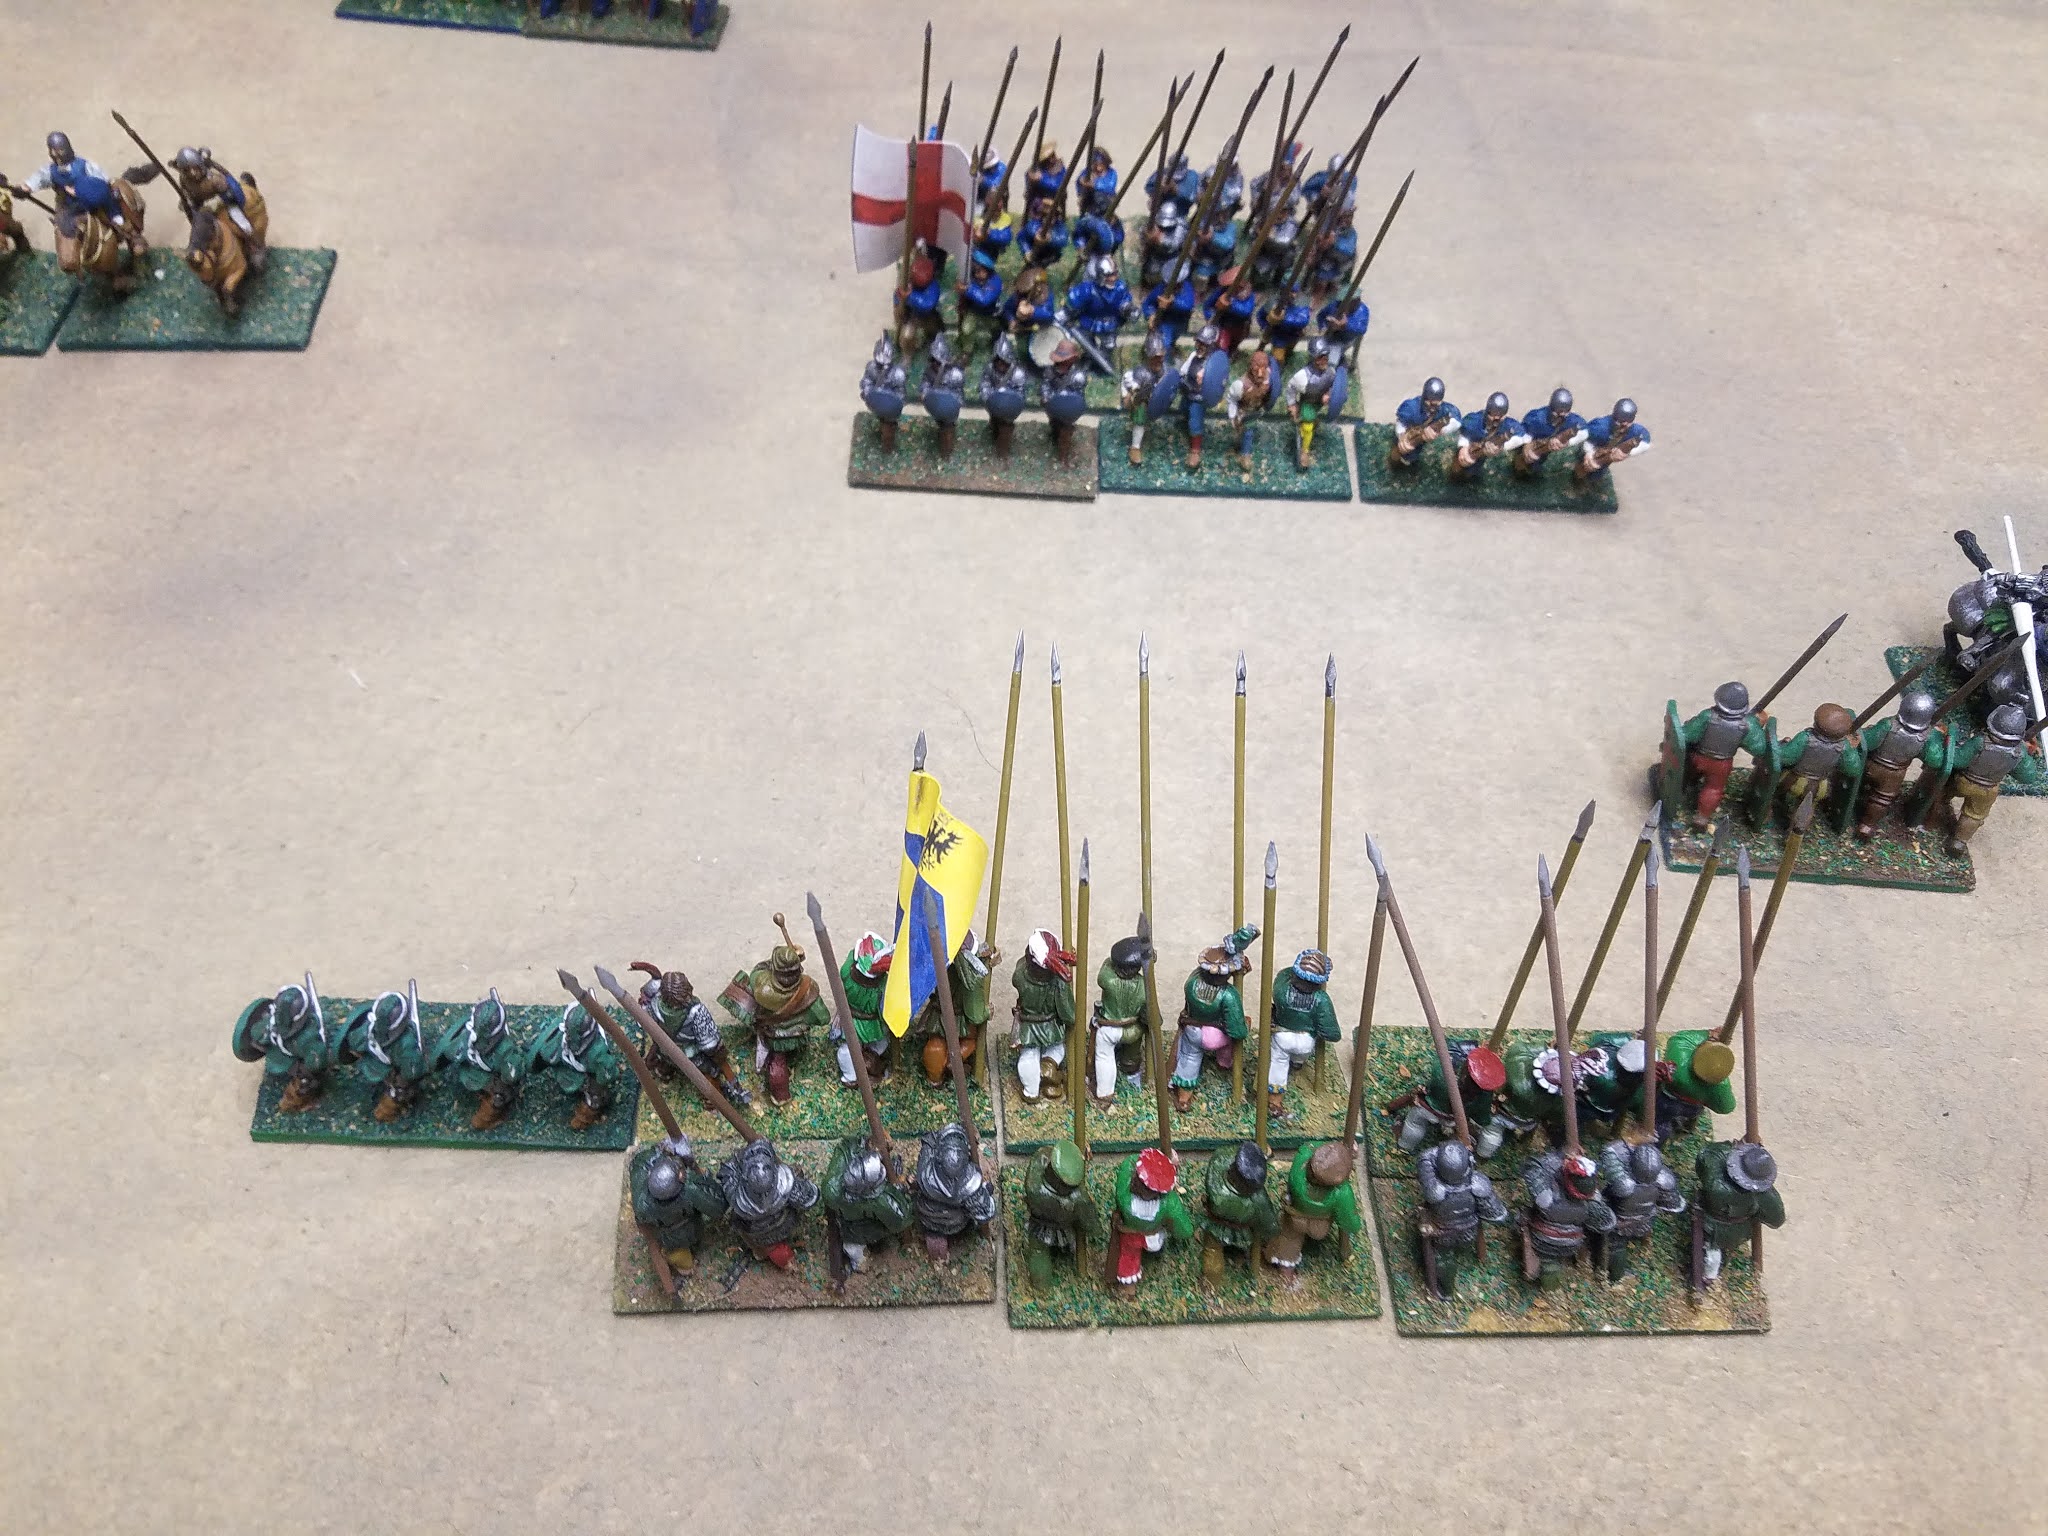
The tercios close.

On the left, the Ruritanians are down to one LH due to stationary LH crossbow fire. On the right, Ostland has lost another Kn, making 8 elements lost. The opposing tercios end the game almost, but not quite in contact.

Final position on the right.

End of battle positions.
An interesting battle and some interesting results with the modified rules. We enjoyed the DBA 24 concept and plan more games with just the DBA 24 modifications. The single pip die really requires keeping elements in groups together to maximize & economize movement.
Resumption of Gaming: Sumerians vs European Bronze Age Battle Using DBA 3.0
Well, after a 5 months hiatus from gaming due to COVID-19, my friend Bob & I finally resumed our gaming with a couple DBA 3.0 games. Our first game was an affair between the Sumerians and the European Bronze Age armies. Bob's European Bronze Age figures consisted of older Perry sculpts from Wargames Foundry. Bob's army was also made well before DBA existed and was loosely based on information that the Perry's had provided for the figures, including troop types that are not in the current DBA 3.0 list. In fact, the European Bronze Age army didn't exist in the original DBA 1.0 rules. We used Bob's army as is anyway for this game.

The Sumerians deployed for battle. Troop types include pikes, a 4Bw, 2 x HCh, and a 3Ax. The element in the rear represented the camp.

The European Bronze army deployed for battle. It consists of 4 x 4Pk, 2 x 3Wb, 3 x Ps, 2 x LH, and a LCh General element. One of the Ps is deployed in a built-up area. The element in the rear is the camp, including hogs.

The game at the end of turn 1. The Sumerians advance their pikes and Ps on their right flank. The Europeans advance their LH on their right flank with a subsequent move.

At the end of turn 2, the Sumerians shifted their HCh, 4Bw, and 3Ax towards their left, while the European LH took the high ground in the Sumerian left-rear.

At the end of turn 3, the European LH on the Sumerian far left turn to face the flank of the Sumerian army.

European Bronze Age camp.

At the end of turn 4, the Sumerian 4Bw has shot down one of the European LH, while the other advances towards the Sumerian camp. The Sumerian HCh move closer to the European battleline. The European 3Wb and Ps from inside the built-up area charge the line of Sumerian Ps on their left flank. The Sumerians lead 1-0.

At the end of turn 5, the European 3WB have destroyed the Sumerian Ps on their left flankas a European Ps "closed the door" on one of their foes. The Sumerian HCh have engaged the European LCh general causing him to recoil. The Europeans now lead 2-1.

Close-up of the Sumerian & European Generals facing each other.

Both sides are able to close the door on the other in turn 6.

At the end of turn 6, the European General's element is destroyed. The Europeans have not had enough pips for their LH in the Sumerian rear to reach the enemy camp. The Sumerians regain the lead 3-2.

At the end of turn 7, the Europeans have moved their 3Wb to threaten the flank of the Sumerian pike block. Their LH has maneuvered within striking distance of the Sumerian camp.

Sumerian & European pikemen face each other.

At the end of turn 8, the Sumerians have enough command pips to face the 3Wb threat on their right, and the Sumerian general has engaged the lone European Ps with overwhelming force in the open.

The combat results are that the Sumerian HCh's have overrun Ps and the European 3Wb has recoiled from the pikes. The Sumerians win the battle 4-2.

The European LH was not able to attack the Sumerian camp. The Sumerian 4Bw is in a position to shoot it next turn.
Overall, an interesting an enjoyable first game. We were using an enlarged battlefield for this game. Bob's version of the European Bronze Age army is an interesting one, that would probably work better if there were more battlefield terrain.
I will make a separate blog post about our second game soon.
Thursday, March 26, 2020
Gaming in the Age of Corona
Last week, Bob & I were able to get in a game the day before our governor imposed a "shelter-in-place/quarantine" order due to the Corona Virus. We set up the "Along the Danube" scenario for Blucher, French vs Austrians. Below are some shots from our game.


The French army deployed for the game.

The Austrian army deployed. It may not be clear in the photo, but the group on the left is on top of a large hill. The red disks in the background are objective markers. French control of both would cause the game to end immediately with a French victory.

Another view of the Austrians deployed on the central hill. Bob outlined the crest of the hill with chalk.

An Austrian Grenz brigade deployed in the far wood top left, and a view of the French far-left flank in the foreground (the wooden stick was the left flank table boundary). Note the labels on each brigade. We marked off losses directly on the labels using pens. However during the game, a better way of tracking casualties became evident that we will try in the future, namely casualty counters or markers instead of using pencil/marker to track casualties.

An Austrian infantry corps defending behind a stream.

The French slowly advance. The main error in our game was not using reserve movement. With infantry moving at 2 base widths maximum every turn, you can see in the photo above how many turns it will take to close with the enemy at the other side of the photo. If the French had used reserve movement, they could have advanced up to 12 base widths, or nearly all the way to the other side of the photo in a single move. A lesson learned. Reserve movement strategy is something players need to strategize about when deploying their troops in Blucher.

Artillery fire: A French battery fires on an Austrian infantry brigade. I made the yellow template to assist with determining the firing unit center and 45 degree shooting/charging angles.

Another view of the battle.

The Grenzers are hiding in the woods from French Hussars & artillery.

The French "Marechal d' Empire" urging his troops forward.

The French slowly getting closer.

French infantry & cavalry. The infantry has a better look in two ranks of stands. If we want to do a larger battle, like Austerlitz, we can use a single stand of infantry per brigade if we do not have enough troops using 2 stands.
Unfortunately, the game turned into an artillery duel. The Austrians came off the worst, forced to retiring two infantry brigades whose elan had dropped to 1 each by artillery hits. Retiring a unit before all of it's elan is gone is a way of avoiding the unit being counted as destroyed for victory purposes. By the end of our game, nothing decisive happened. Most of the French guns had nearly expended their ammo, while the Austrian guns had a couple rounds/gun left. We will try it again after the quarantine is lifted.
Friday, March 13, 2020
Preparing to Play Blucher
My friend Bob & I are planning to play the introductory scenario for Blucher called "Across the Danube." I have been preparing some units for the game. The last time we played (over a year ago) we used a die to track losses in the game for each unit. I wondered at the time if there weren't a better way of tracking casualties & wanted to avoid using a roster system, if possible.
I came up with making labels for the Blucher units using MS-Excel that would affix at the rear of the stands. The labels are similar to the unit cards used in Blucher, and has all the information needed to play the game. I made the labels an olive green color so they would blend into the game-mat we would be using. The labels contain the nationality, unit name, traits, corps ID, elan, and movement rates on the label. Elan losses would be marked on the label with a pencil. We will see how this works.
I also decided we would use 2 stands of infantry to represent an infantry brigade instead of one. This meant I would need more stands of infantry to make brigades, but the units would have a better appearance. I instead of using a marker to indicate if a unit is "prepared" or not (prepared includes forming square), the rear stand of a 2 stand infantry brigade could simply be turned around facing the opposite direction like a unit in all-around defense to indicate "prepared."


Wednesday, March 11, 2020
More Recruits
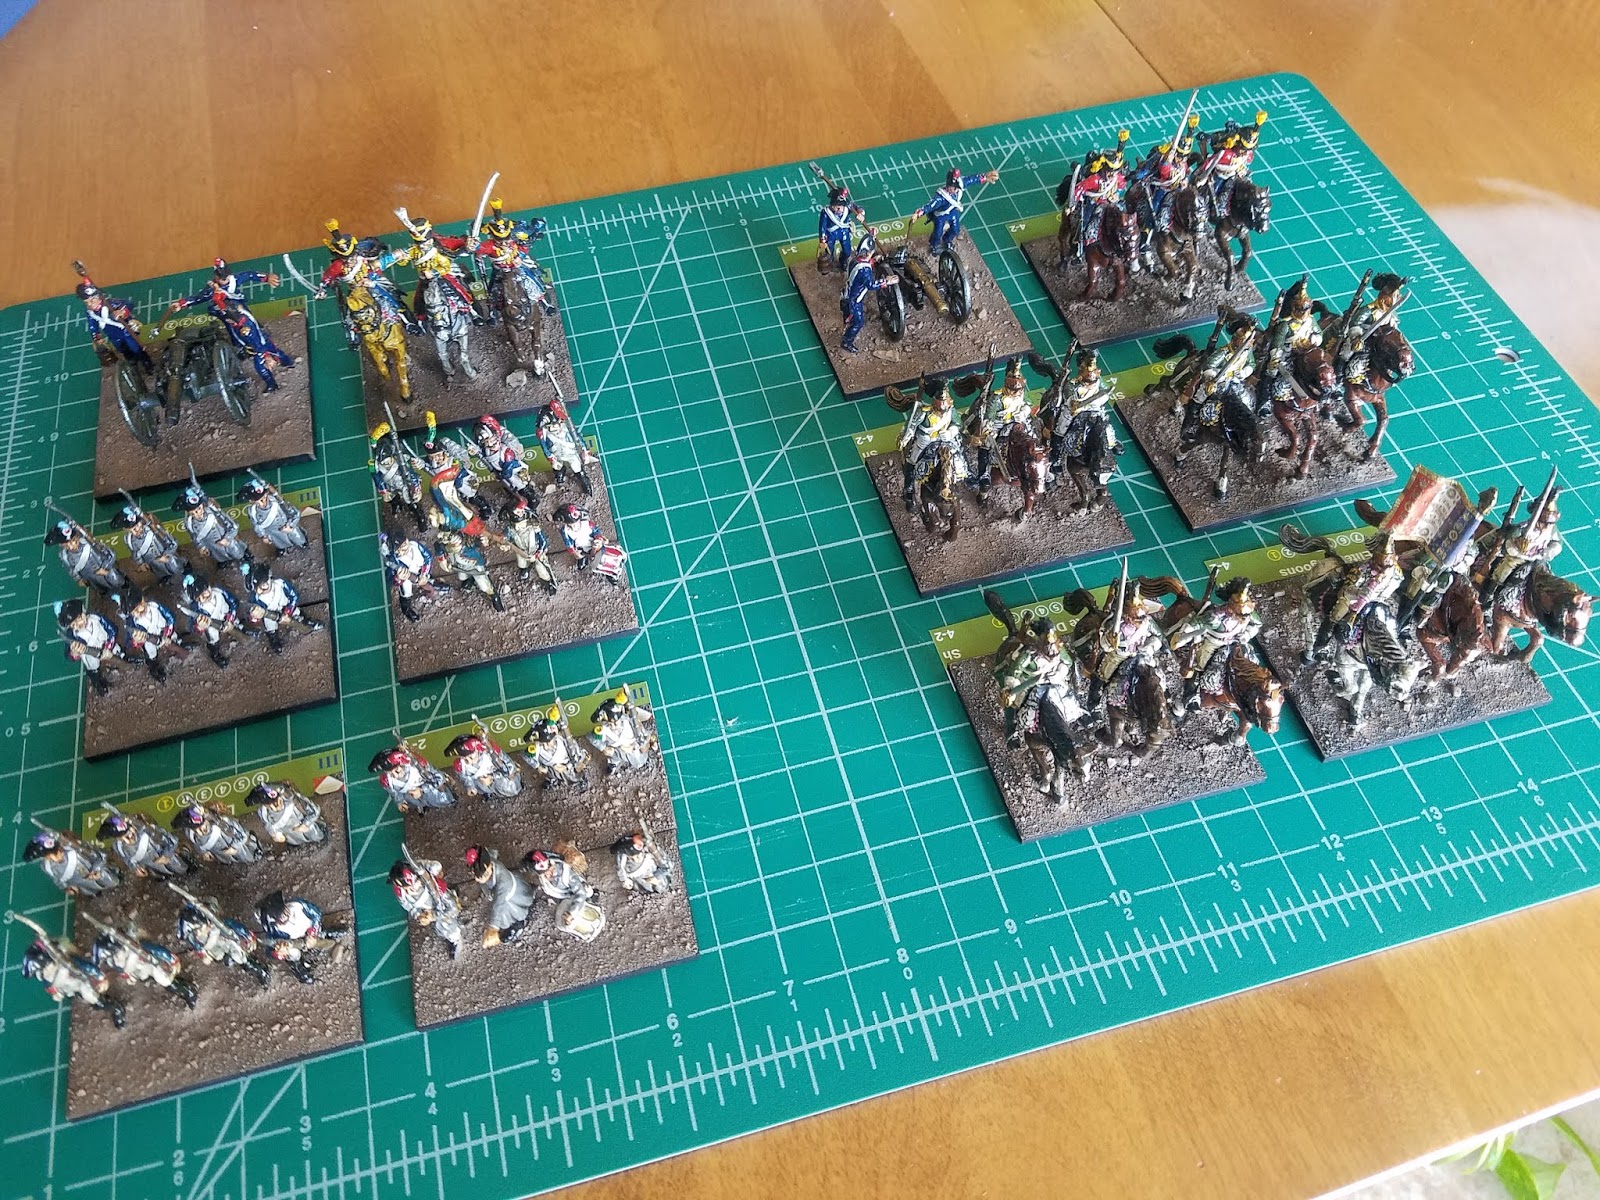
I've been working on re-basing and varnishing about 114 painted French infantry in bicornes that I bought from friend Mike Zammuto. They are Victrix plastic figures that were organized for the Column, Line, & Square rules. I had to cut them from their plastic bases by trimming around the figure base & leaving a same-sized piece of the plastic base still attached. I used a wire cutter, which went surprisingly fast. I roughed up the base bottoms, then glued the figures to MDF laser-cut "Georgo" bases that I purchase from Games-Plus in Mt Prospect IL. I use wood glue, which is stronger than ordinary white glue. After drying 24 hours, I then covered the flock with "Future Floor Finish", an acrylic liquid which, when dry, turns the flock into a solid acrylic mass. I then varnished the figures using "Polyshades" polyurethane with a tudor brown tint. Below are the results.


 The Polyshades give the figures a light shading similar to Army Painter, but much less expensive. I prefer a gloss finish, much like what famous British wargamer Peter Gilder's figures had. I have to terrain the bases next.


Subscribe to:
Posts (Atom)