We used Caesar's commentaries and the Society of Ancients 2005 Sambre Battle Pack document as references for this game (available on the DBMM Yahoo Group website). The battlefield map was taken from Peter Sides' book "Ancient Historical Battles, Vol 2." Caesar had 8 legions in total. Six legions were deployed on a low hill near the Sabis River constructing a camp. The other 2 legions (raw troops) were far back, marching up towards the camp. The Romans sent a force of cavalry and light infantry across the river to scout. There was a large wooded hill on the other side of the river, where the Belgae were massing to attack. This was the setting for our game.
I converted the order of battle into Giant DBA format, and was as follows:
Roman Order of Battle
Command A: 7th & 12th
Legions = 10 x 4Bd, 2 x Ps
Command B: 8th & 11th
Legions = 10 x 4Bd
Command C: 9th & 10th
Legions = 10 x 4Bd, 2 x Ps
Command D: 13th & 14th
Legions = 10 x 4Bd, 2 x Cv, 1 x 3Ax, 2 x Ps
Command E: Scouting Force - 6 x Cv, 3 x 3Ax, 2
x Ps.
Belgae Order of
Battle
Nervii Left Flank Command: 12 x Wb, 2 x
Ps, 1 x Cv
Nervii Center Command: 12 x Wb, 2 x Ps,
1 x Cv
Nervii Right Command: 12 x Wb, 2 x Ps,
1 x Cv
Atrebates & Viromandui Right Flank Command:
12 x Wb, 2 x Ps, 1 x Cv


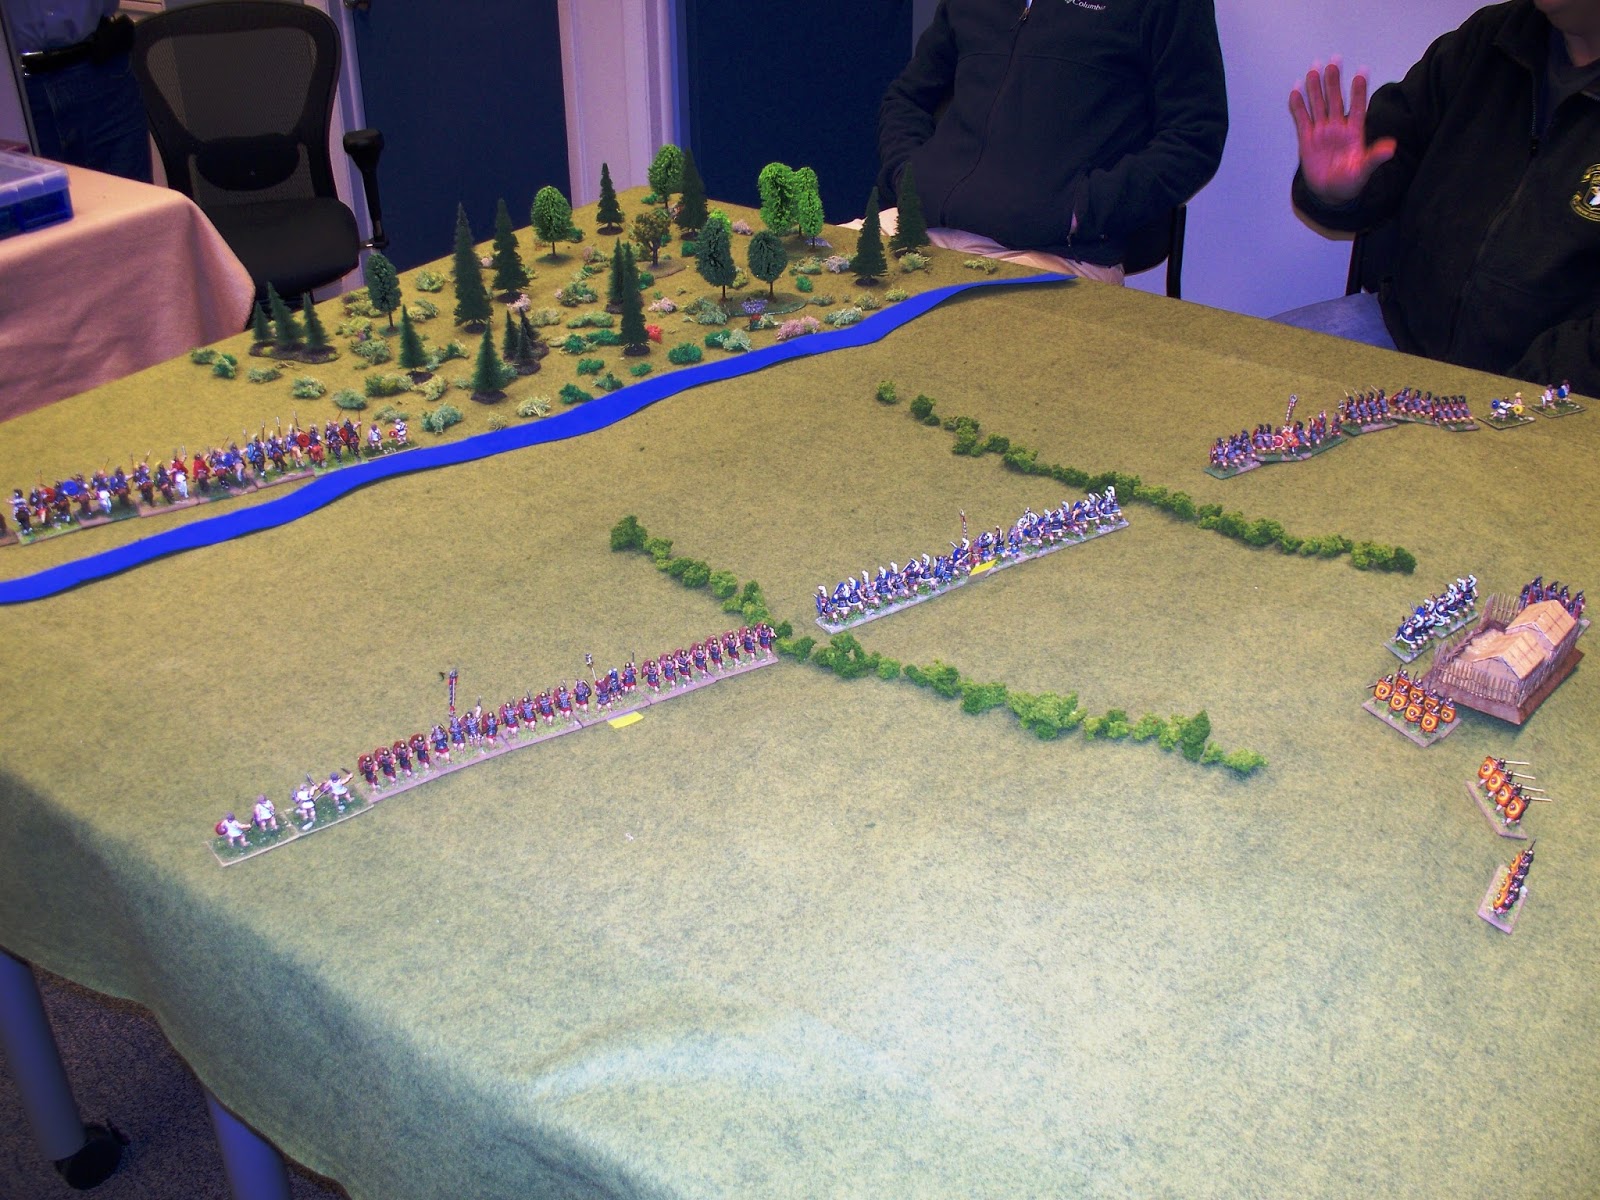

Above left is another view of the table. Above right is the Scouting force.


Above left is the blue shielded 8th & 11th legions deployed between the hedges. The hedges only effected movement, reducing movement to 1 BW. Above right is the elite 9th & 10th legion. In our game, elite blades have the option of pursuing defeated foes instead of it being mandatory. We also determined that "quick kill" results only applied in the enemy bound, & elite blade recoiled instead when beaten, but not doubled by warband in it's own bound.


Above left, the Belgae come screaming out of the woods towards the Roman scouts. Above right, the Belgae cross the Sabis and towards the Romans on the hill. We used a 50% command demoralization point in this game. However, the 13th & 14th legions and the Atrebates & Viromandui commands were raw or unenthusiastic troops whose break point was 33%.


Above left, the Roman scouts fall back across the Sabis and defend the bank (the Sabis didn't effect movement, but both sides could defend the bank at +1). Above right the far left Belgae command is approaching the red shielded legionaries.


Above left, the Atrebates & Viromandui command set to cross the river. Above right, the Belgae approaching the blue shielded 8th & 11th Legions.


Above right, the red shieded Romans are in a desperate fight with the Belae. Above right, the blade stands in and near the camp were allowed to make tactical moves towards their commands without pip expenditures until they came within command distance of 8 BW. Apparently in real life, these troops had instructions to join up in the event of an attack. Also note the 13th & 14th Legions approaching in the rear.


Above left, the Roman scouting force is being reduced by attrition. Above right, the 7th & 12th Legions were at the breaking point.


Above left, the 9th & 10th Legions have moved up to support the scouts. Above right, the 8th & 11th Legions are now engaged in a desperate struggle.


Above right, the 7th/12th Legion command has broken. Cavalry from the 13th/14th Legions has arrived to support. Above right, the scouts are still holding on, supported by the 9th/10th Legion.


Above left, the battle line of the 8th/11th Legions is really broken up. Above right, the Romans are trying to hold the remnants of the 7th/12th legions.


The 13th/14th Legions are deploying, but still too far away. Above right, the scouts suffer 50% casualties and the command breaks.


Above left, the 8th/11th Legions command breaks. This ends the game. Above right, the remnants of the 7th/12th Legions, with the 13th/14th Legions just coming into view.

Above is the 13th/14th Legion, too little too late.
Historically, the Belgae left flank made it up to the Roman camp before it was thrown back. The Roman scouts escaped the Belgae onslaught, and the 9th/10th Legions drove the Belgae back across the Sabis and apparently reached the Belgae camp. The Belgae were destroyed.
The players were:
Belgae: Ron Jaffe, Bill Hupp, Andrew Kirby
Romans: Dave Benjamin, Bob Pavlik, Sylvain Durand.
We will tweek some things when we run this game again, but overall it seemed to work Ok.
Overall, the players enjoyed the game. Time elapsed was 3 hours.
Thanks a lot for sharing. We just fought the same battle with our 25 mm miniatures. A lot of them are the same as yours. The result was a Belgae defeat but 2 corps breaks against One Roman ( on their far right). Cesar perhaps dead !
ReplyDeleteRegards