Monday, June 5, 2017

World War 2 Gaming

After a couple years of nearly non-stop ancients gaming, Bob & I are starting to play WW2 in 15mm. This is something we haven't done for maybe 10 years. We've played Flames of War and Blitzkrieg Commander in the past. This time, we are playing an older set of rules that seem to still work well: Spearhead by Arte Conliffe. 

The scale of Spearhead is my favorite scale: 1 stand or vehicle = 1 platoon. This was the scale of Panzerblitz & Panzerleader, famous Avalon Hill boardgames. It is also the scale of Arnold Hendrick's miniatures game "1944," Frank Chadwick's "Command Decision," and the 1978 "Standard Unit" for wargaming by Gene McCoy of Wargamer's Digest magazine. Anyway, we are trying Spearhead to see whether it will fulfill our WW2 gaming needs. I played Spearhead extensively over 15 years ago. The only thing the game system may need is a little updating, but I believe the game mechanics are very good.


Above is the terrain Bob & I used for our first game, Russians vs Germans, June 1941. The scenario came from an old "Battle Stations" scenario in Wargamer's Digest magazine. The Russians hold the town with a Rifle battalion on the far side of the stream. The Germans had a reinforced Infantry Battalion that attacked from the bottom of the photo, their objective to take the town. We didn't take photo's of our game, but basically the Germans held the Russians attention in the center with an infantry and heavy company. The other two German companies and a couple Sturmgeschutze's attacked the Russian left flank by the ford. The Germans in the center took some casualties, but the pressure by the Germans caused the Russian battalion to break. This was an enjoyable small game.

Bob, Ron J., & I tried another game, this time North Africa. Bob has an extensive collection of Desert Campaign miniatures in 15mm. For this game, we used the point system in the Spearhead Scenario Generation System to create our two battlegroups, around 400 pts each. The Germans had a Panzer and Schutzen Battalion, and a 105mm howitzer battalion. The British had a Motor Battalion, two Tank Regiments, and a 25pdr Battalion. 


 The photo above shows the Schutzen battalion closing in on the central built-up area and the Panzer battalion on the left flank. The British had their motor battalion on the right, and a Tank Regiment of Crusaders, reinforced by an armored car squadron, on their left.


 Panzers approaching a wadhi.


 Indian Motor Battalion deployed.


 The Crusader Tank Regiment deployed, armored cars in front. One tank is suppressed from anti-tank fire.


The Schutzen battalion in the foreground, the Panzer's in the background. An 88mm FLAK battery is deployed mid-upper left.

Where is the second British Tank Regiment you may ask? It came onto the board via flank march at the center of the British right, just when the Panzer's had taken a chance and changed orders to attack to their right, causing the British Grant & Honey tanks to face the Panzer's rear when they came on. Game over as the Panzer's broke from casualties. It was still an enjoyable game.

Spearhead works well, as the die rolling is one per combat. No saving throws or multiple throws per combat, etc. We doubled the movement/range scale to 2" = 100 yds. Our forces engaged quickly and the game looked right with 15mm figures & vehicles.

In Memorium


We lost a couple of good hobby friends in the last few months. Bill Garrett passed away in January. He was an avid Napoleonic gamer and had an extensive collection of 25mm Minifig Napoleonics. He also had a large collection of British Colonials in 25mm, as well as AWI, ACW, among others. Bill regularly hosted many of our games after he moved to Belvedere IL a few years ago, when he finally had a large gaming area and storage space for his miniatures in his house. Bill was a devout Christian, always good natured and friendly. We will miss Bill, though I believe Bill is in a better place now.

Bill's Obituary: https://andersonfcs.com/obituary/william-harvey-garrett/

Another friend we lost is Steve Lawrence. Steve was well known in the Chicago-land miniature gaming scene starting in the 1970's. An excellent painter and gamer, he was very prolific and creative. We haven't seen much of Steve in recent years- he took care of his aging parents and had various serious health issues. Steve was also a devout Christian man...he is in a better place now.

Steve's Obituary: http://hosting-24993.tributes.com/obituary/show/Stephen-L-Lawrence-104841257

Giant DBA Sabis Redux

I haven't updated this blog in awhile. This past February, we redid our previous Battle of Sabis (or Sambre) using Giant DBA 3.0. Our previous attempt was documented here. The latest battle was a complete success. Some of the changes were:

1. The board was changed and the battle was fought across the narrow side of the board. This put the Gauls closer to the Romans, and also meant the Roman reinforcements would arrive closer to the battlefield.

2. The Roman cavalry and light infantry was divided among it's parent commands instead of being a separate command. It was also given the first move, so it could attempt to escape from the Gallic horde.

3. The Roman reinforcement command arrived by turn 4.


The situation at the start of the battle. The Roman cavalry & lights see the Gauls charging towards them out of the woods.


The Nervi (Gaul) commander and his young trainee surveying the action, mid game.


                                                The view looking towards the opposite flank.


The Roman reinforcements arrive and start to counter the strong Nervi left wing (see top-center).


The Nervi approaching the Roman line.

The lines clash.

The Nervi right never really closed, while the center and left did most of the fighting.

The game ended a Roman victory when the two center Nervi commands broke. We ran this game at 2017 Little Wars in April, with the Nervi getting revenge on the Romans.

Thursday, March 30, 2017

Chalons 451 AD: A BBDBA AAR:

In January, we tried a 28mm Big Battle DBA scenario of Chalons 451 AD. Chalons is a difficult battle to reproduce because of the varying accounts & orders of battle available. For our purposes, we leaned towards Simon MacDowell's account in the Osprey book: "Catalaunian Fields AD 451" as it is based on more recent scholarship. However, we respect those who have differing opinions about the battle.

For our order of battle, we used six 12 element DBA 3.0 armies from the DBA rulebook as modified below:


Patrician Romans (Aetius): List II/82a

Alans (Singiban): List II/58. Note: we replaced Alan 3Kn with Cv to represent their hesitancy at the battle.

Later Visigoths (Theodoric, Thorismund): List II/83a

Huns (Attila): List II/80a

Gepids & Thuringians (Ardaric): List II/71. Note: we replaced 2 x Ps with Thuringian 4Wb, which were present at the battle.

Ostrogoths, Heruls, & Rugians (Widimir): List II/67b. Note: We replaced 4 x Ps with Rugian & Frankish 4Wb, which were present at the battle.

Demoralization:
For our game, the BBDBA demoralization rules were modified as follows: A command that loses 6 elements is demoralized. All surviving elements suffer a permanent -1 to their combat die. Only individual element or "hold" group moves may be made. Elements/groups not assigned pips will rout (flee towards their base table edge). 

Victory Conditions:
The first side to have 2 commands become demoralized and have lost more elements than the enemy has lost the battle. 

Personal Victory Conditions:
To add a little spice to the game, we used personal or player victory conditions (which were adapted from Simon MacDowall's Legio Wargames website ): 

Attila wins if he is still alive, the Huns win, and no more than ¼ actual Huns are casualties.

Adaric wins if he is still alive, the Huns win or draw, and more Huns than Gepids are casualties.

Walamir wins if the Huns win or draw and the Ostrogoths inflict more casualties on their opponents than the Gepids did on theirs.

Aetius wins if he is still alive, the Romans win, and the Visigoths have more casualties than the Romans

Theodoric wins if the Romans win or draw and no more than ¼ of the Visigoths are casualties.

Sangiban wins if he is still alive, the Romans win or draw, and none of his heavy cavalry are casualties.

It is quite possible for more than one player to win. Note that Theodoric, and Walamir do not have to survive to win. In fact, a heroic death could even be considered to contribute to victory. Attila, Aetius, and Adaric, however, have future plans that requires their continued existence and Sangiban was not that heroic.

See photos of our battle below.

Deployment:
Note: Terrain pieces were for aesthetic purposes only, having no effect for movement or combat. Exceptions were the Marne River (top of photo) which was un-crossable, and a large hill (just seen lower right).

The Visigoths:

The Alans:

The Romans:
Note: We used Marian Roman & Gaul cavalry for the Romans, as our Late Roman cavalry is still under construction.

The Ostrogoths:

The Huns:

The Gepids:

The battle opens, the Alans (upper-center) move forwards! (very unhistorical)

The Alans engage the Huns (center) while Roman & Gepid horse engage (lower right).


After drawing the Alans towards them, the Huns begin enveloping them (left-center). The Romans and Gepids have each taken casualties, but the Romans are pressing the Gepids from the position. 


 Third turn, the Alans are getting the worst of the dice and the Huns slowly begin to envelop them (center). Ostrogoths and Visigoths continue to close (below).


The Romans & Gepids have each taken casualties in the fight.

Fourth turn, the Huns are completing the envelopment of the Alans.


Fifth turn, the Gepids have held their ground and blunted the Roman attack. The Alans have been destroyed by the Huns, and the Goth armies have engaged.


Sixth turn, the Gepids press the advantage and begin to mop up the Romans, the Huns send half their troops to assist against each enemy flank army, while the Ostrogoths and Visigoths slug it out.


Final turn, while the Ostrogoth horse struggles, their infantry performs well. The arrival of Huns on the remaining flank armies of the Roman side ensures their ultimate defeat.


The Hun side won the battle. Attila won his personal victory conditions while the rest of the players did not. The game moved smoothly and quickly, we played to a conclusion in slightly under two hours. One item of interest is that the Huns lost no elements at all. I think this will be a good convention game, even for players unfamiliar with DBA.


Friday, January 13, 2017

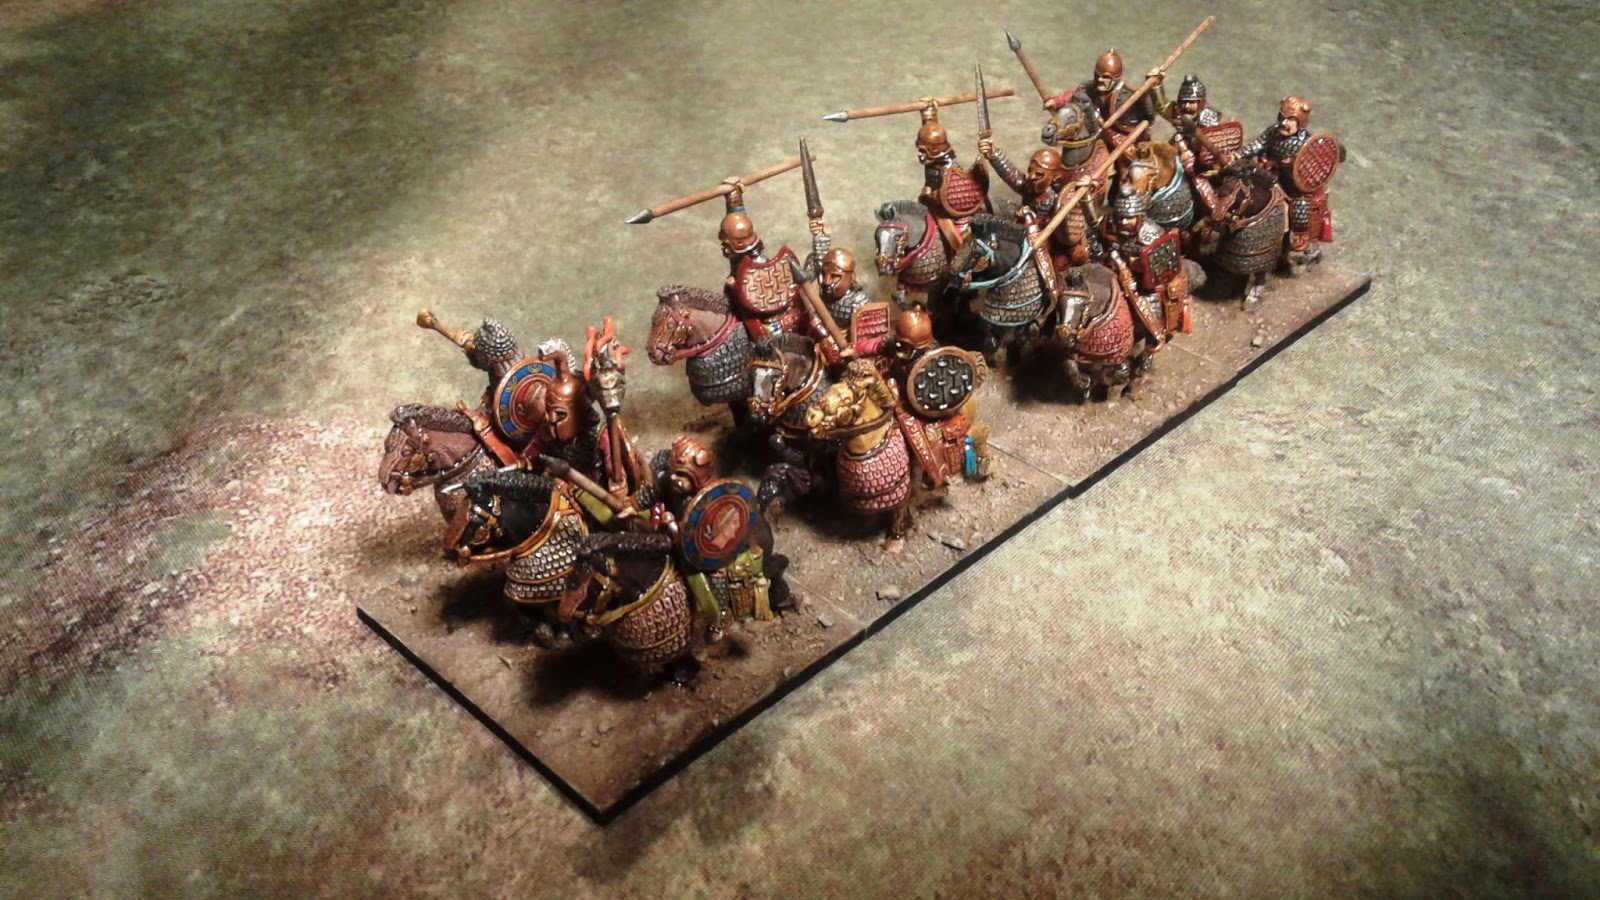
Skythian Noble Bodyguard

Just finished (except for flocking) a group of 28mm Skythian Noble Cavalry from 1st Corps. I am slowly building a Mithradaitic Army for Big Battle DBA. I am using the Skythians as the bodyguard for Mithradaites. I gave the command element Hellenistic shields, to give them a little Pontic flavor.