Showing posts with label 15mm. Show all posts

Saturday, October 29, 2022

Russian Civil War Interlude

I'm finally getting around to posting some pictures of a game I played in June. It was a 15mm Russian Civil War game put on by local gamer Ivor Janci. The figures, rules, and beautiful table layout were his. The game lasted several Wednesday nights over several weeks where we played a few turns each night.


The Red forces are defending the village (foreground). The White are approaching from the top.


To the right of the village, the rest of the battlefield can be seen.


The Whites are advancing to assault the village.


A Red unit on the hill is preparing to fire on the White cavalry.


The village defenders prepare.


The Reds advance across the central large open wheat field while cavalry are sent to support the village across the stream on the left.


A large Red infantry and Tchanka force moves around the back of the hill to flank the Whites.


The Whites charge across the wheat field near the village while the Reds bring up reinforcements to support the village.


White cavalry engages Red sailors on the wood edge.


The Red infantry climbs the steep hill towards the White right flank.


The Tchanka's are racing around the hill.


Red artillery on the hill opening fire.


A strong Red infantry force supporting the village. The White cavalry has eliminated the sailors on the wood edge.


White cavalry charging a Red battery on the far stream bank and the Red cavalry that just crossed the stream.


A full scale White attack.


Half the White cavalry is destroyed.


White infantry emerging from the wheat field to attack the village. The Red sailors are ready to defend.


The Whites press their attack on the outskirts of the village (above) and have wiped out the Red battery crews. The Red infantry is swarming forward on the left flank of the village towards the small wood on the flank of the wheat field.


The Red infantry is still swarming over the large hill while the Tchanka's are advancing through the gap.


The Whites have taken two of the buildings, with swarms more reinforcements advancing in the distance.


More Red cavalry arriving in the center behind the infantry advancing in the field.


Overall, this was a fun game with simple rules. The stands of troops represent platoons. The table was 12' x 6.'


Wednesday, April 20, 2022

Summer 1942 Desert Battle: A Spearhead AAR

 Recently we made a diversion from Ancients and played a 1942 Desert game using the Spearhead (SH) rules. For this game, we played a meeting engagement of about 450 pts using the points from the Spearhead Scenario Generation System. Our scenario was basically of both sides having 2 armored and one motorized infantry battalion, entering the board from opposite ends with the option of keeping one battalion in reserve. Victory would be based on defeating 2 of 3 enemy battalions. Regarding modifications to the standard SH rules, we used the following:

  • Increased all the game measurements by 33%. In SH, standard measurements are multiples of 3." Thus, 3" = 300 yrds became 4" = 300 yrds.
  • Allowed select recon platoons to "disperse" prior to the game, where they can only suppress enemy or be suppressed on a roll of "11 or 12" using 2 x 6D (a rule borrowed from Great War Spearhead). They automatically evade a full move if the target of an overrun or close assault. They behave in all other ways like a recon platoon.
  • Allowed FO's from artillery battalions to call in an area barrage using a template similar to a pre-planned bombardment.

Below is the order of battle for both sides:

 GERMAN FORCES

Panzer Battalion A, 15th Pz Div (Veterans)
1-HQ Tank (PzIIIG short,), 1-PzIIF Recon, 1-PzIIIG short, 3-PzIIIJ long, 2-PzIVF1 short
8 platoons, BP: 6

Panzer Battalion B, 15th Pz Div (Veterans)
1-HQ Tank (PzIIIG short,), 1-PzIIIG short, 3-PzIIIJ long, 1-PzIVF1 short, 1-PzIVF2 long
7 platoons, BP: 5

Schutzen Battalion C, 15th Panzer Div (Regulars)
1-HQ Rifle/SMG, 9-Rifles, 1-HMG, 1-81mm mortar, 1-Engineer, 13 trucks, 
Attachments: 2-105mm Howitzer batteries & trucks, 1-Sdkfz 6/3 (Diana) Tank Hunter, 1-Flak 88 & tractor, 1-PAK38 ATG & truck, 1-GW38t (Bison), 1 FO & truck.
19 platoons, BP 10/13

 BRITISH FORCES (All Regulars)

Armored Regiment 6, 8th Armored Brigade
1-HQ Armored Car, 6-Crusader II, 2-Crusader CS, Attached: Armored Car Squadron 3-A/Cs (Diamler 2#), 3 platoons
12 platoons, BP: 6/8

Armored Regiment 7, 8th Armored Brigade
1-HQ Armored Car, 6-Lee/Grant, 5-M3 Honey
12 platoons, BP: 6/8

Motor Battalion, 8th Armored Brigade 
1-HQ Rifle/SMG, 6 Rifles, 3-HMG, 1-Eng SMG, 1-3" mortar, 3-Carrier Platoons, 2-2pdr Portees, 2-6pdr Portees, 12 trucks, Attachmens: 2-25pdr howitzers & tractors (on table), 2-25pdr howitzers & tractors (off table), 1-4.2" mortar & truck, 2-40mm Bofors AA guns & trucks, 1-FO & truck. 
25 platoons, BP 13/17

Both players made their plans & gave orders. An account of the game is below:

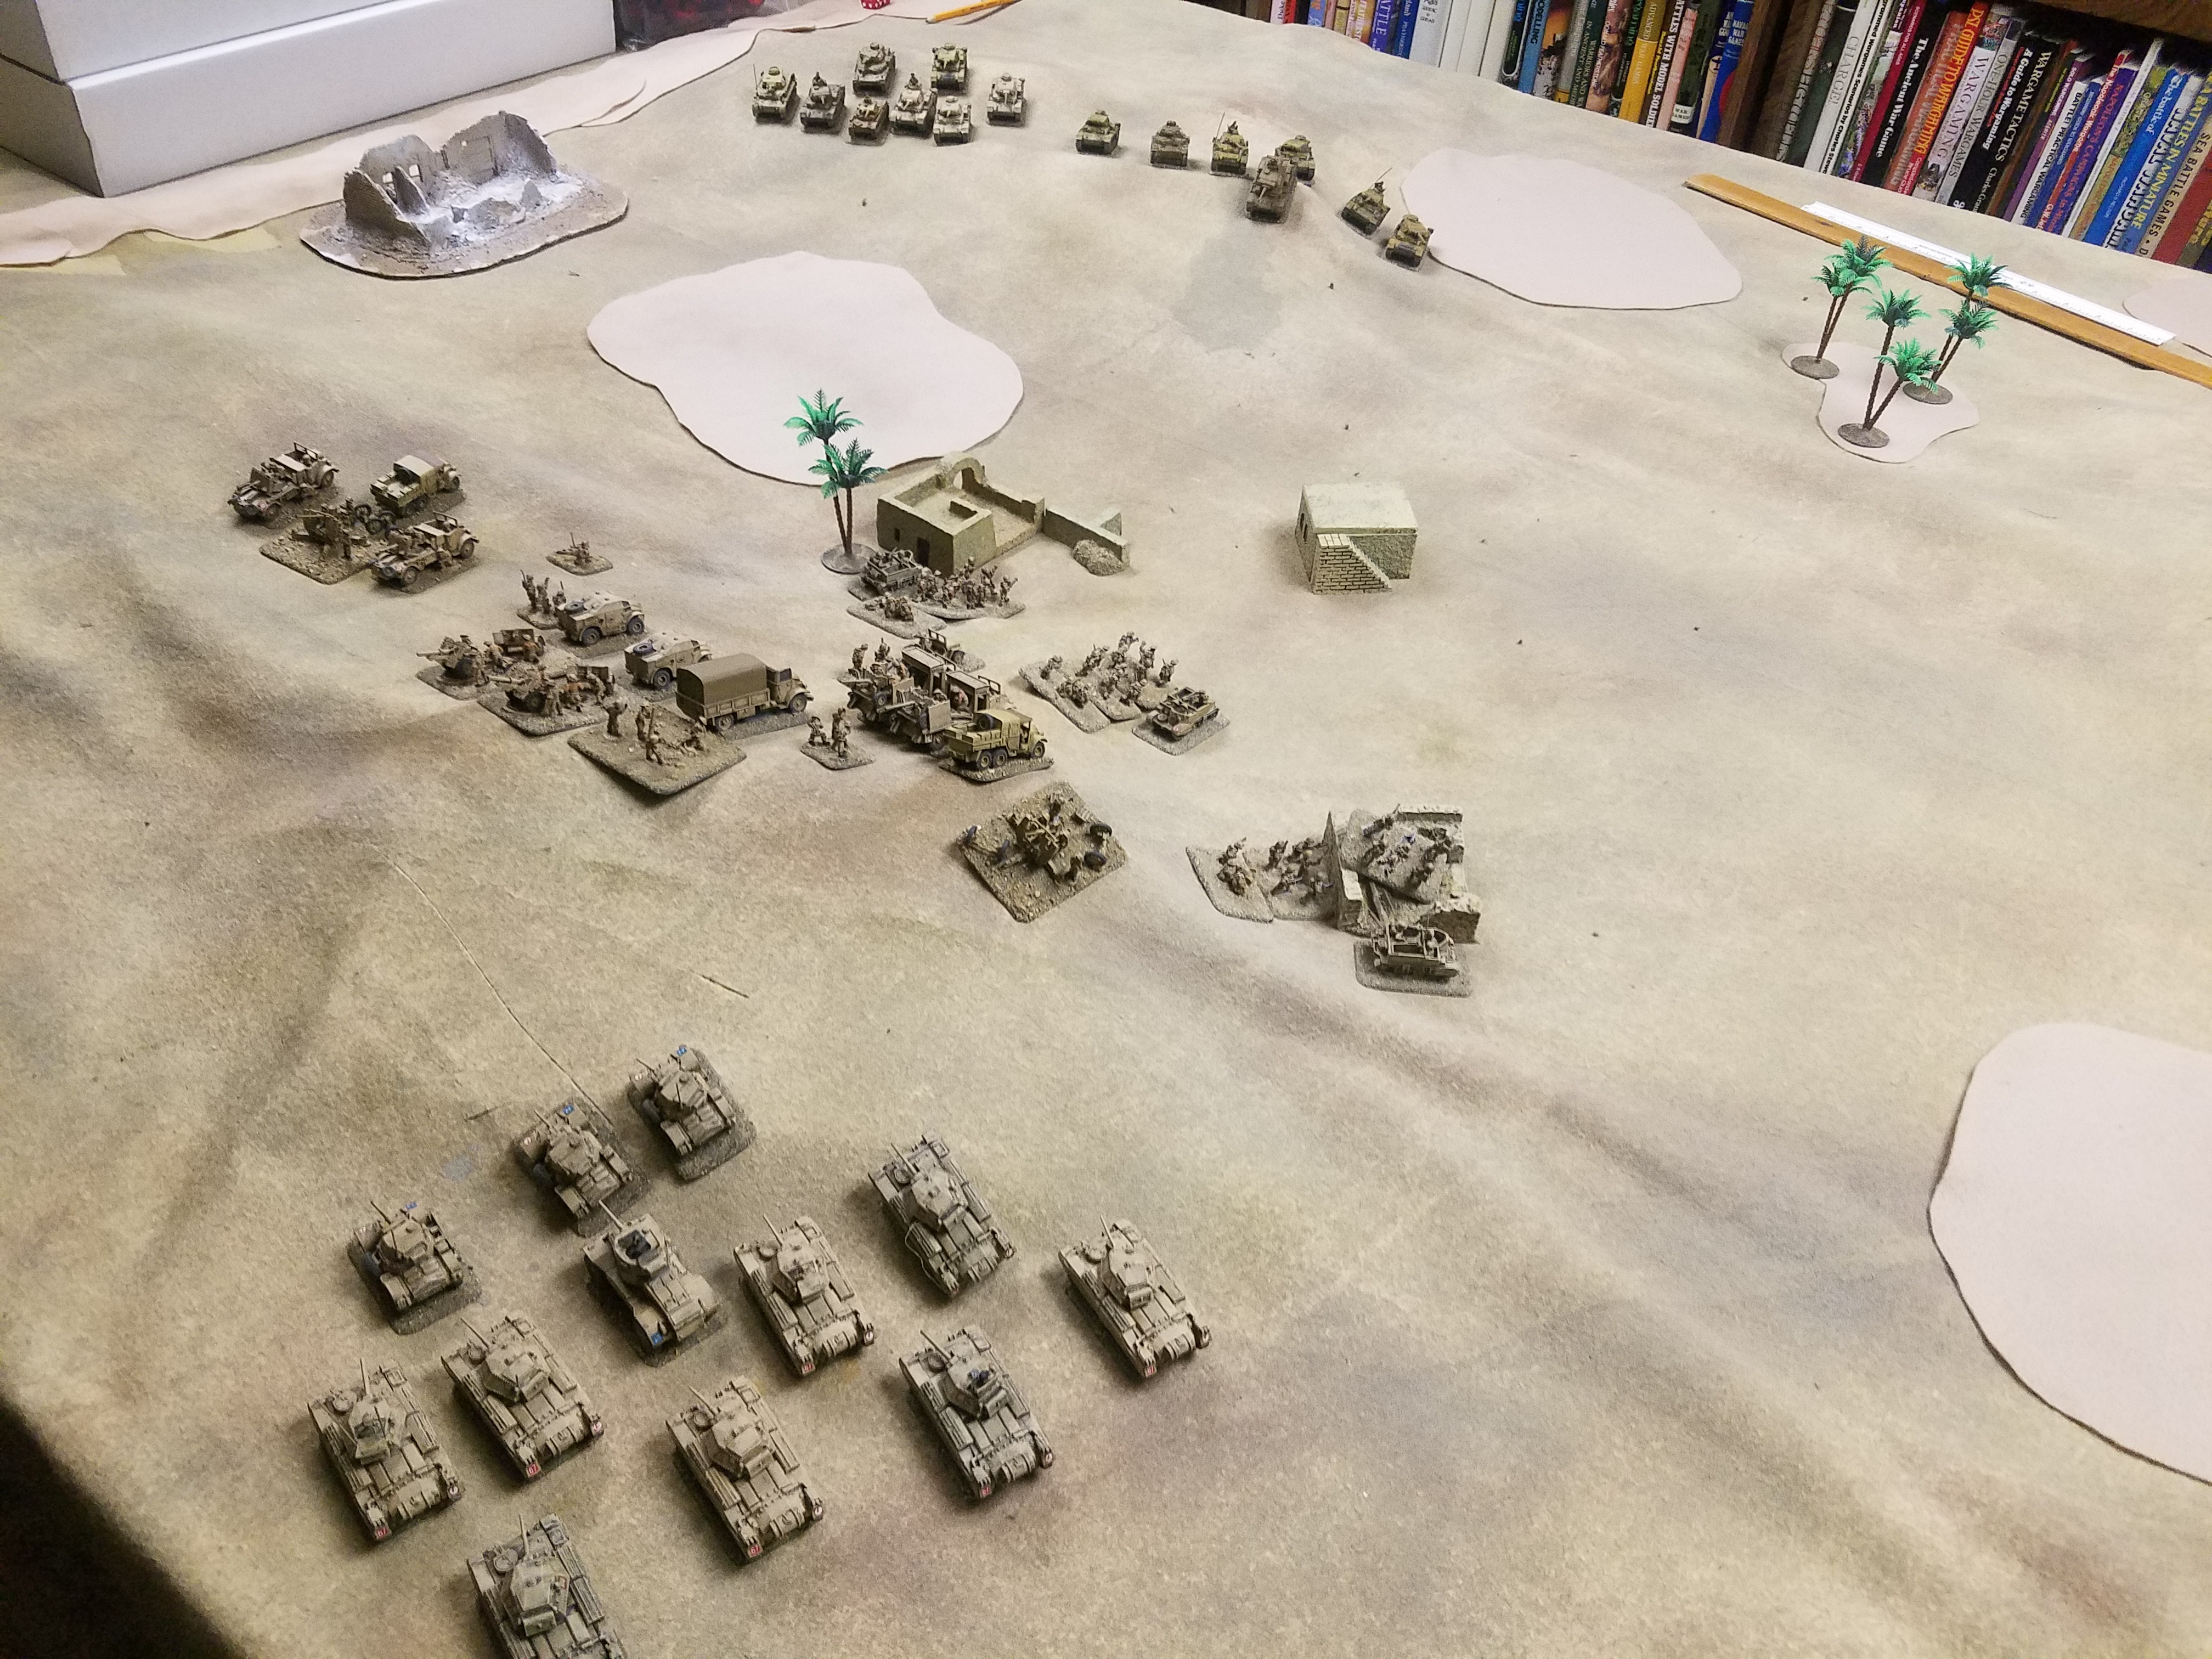
The battlefield. The buildings were treated as light cover. Lighter areas are sand (1/2 speed). 


The British Motor Battalion enters and goes directly towards the oasis & buildings. 7th Armored Regt is to their right (Grants/Honeys). 6th Armored Regt is off board in reserve.


A close up of 7th Armored.


Both German Panzer Battalions enter the board. The Schutzen Battalion is in reserve.


On turn 2, the 6th Armored Regt has appeared from reserve and shifting towards the left flank, while the Motor Infantry is approaching the oasis, leaving support platoons behind on the ridge.
 
 
6th Armored Regt (Crusader 11's & Diamler A/C's). AEC A/C is the HQ platoon.
 

The Panzers spread out.


Motor Infantry approaching the oasis.


The British have occupied the oasis. German Panzers moving above battle speed creating dust (upper left).
 

7th Armored has reached it's objective and is trying to change orders so it can advance further.


Panzer Battalion B advancing on the oasis.
 
 
Panzer Battalion A advancing between some ruins (rough) and sand. Armored Regt 6 starting to deploy on the ridge, while a Bofors, 2pdr portees, and a 25pdr are deployed for action.
 
 
Panzer Battalion B starting it's attack on the oasis.


The Schutzen Battalion is activated from reserve and enters the board.
 

7th Armored is finally able to change orders and moves forward through the sand.


Overview of the battlefield.
 
 
7th Armored clears the sand. Are they heading towards the German infantry or the flank of the Panzers?
 
 
The Germans lose a tank platoon (the red puff marks a burning wreck). British in the building are firing AT weapons at the Panzers.
 
 
6th Armored is still deploying to engage the Germans below.
 
 
The British lose 2 A/C's, and a portee, but the Germans lose 3 Panzers due to a combination of indirect artillery, 2 pdr A/C, tank,& portees, plus Bofors fire. Another portee is suppressed (white & black puff).
 

Another portee (6pdr) on the ridge is suppressed.


Due to orders they can't change, 7th Armored veers left towards the Panzers instead of the Schutzen, presenting their flank to the German gun line on the ridge. Moving at top speed to make dust, 7th Armored tries to obscure their tanks.
 

The Germans are pressing their attack to overrun the Motor infantry, who are only in light cover in the buildings.


The Germans have lost another Panzer, while the Brits lose their remaining A/C and a Crusader.


The fortunes of war definitely favored the Motor infantry, whose AT weapons destroyed 3 Panzers (three sixes in a row were rolled!). Panzer Battalion B is decimated and broken. Meanwhile, 7th Armored has lost 3 tank platoons and 1 suppressed due to 88mm, Diana, & PAK 38 fire from the opposite ridge.
 
 
The German gun line on the opposite ridge.
 
 
Panzer Battalion A has broken off, one platoon away from a morale check. The Germans have lost the engagement.
 
 
The battle proved costly for the British, as the German gun line destroys 4 more tanks of 7th Armored, who was unable to change orders and they fail their moral check.

Overall, it was good to play WW2 again after a long hiatus. Once the forces came into effective range, the action was fast & furious. The British infantry were lucky with their AT fire, it could have been much worse for them. The Spearhead rules are fun and orders are very important, as 7th Armored found out.

Battlefront Miniatures painted by and from the collection of Bob Pavlik.


Tuesday, February 16, 2021

DBA 24: Macedonia vs Persia

Bob & I played another DBA 24 game, this time with 15mm Essex miniatures and using an Alexandrian Macedonian army (II/12) vs a Later Achaemenid Persian army (II/7), a fictitious battle set around 334BC. The orders of battle are as follows:

Macedonia
Alexander (CinC) & Companions (3Kn) x 2
Light Horse (LH) x 2
Hypaspists (4Ax) x 2
Psiloi (Ps) x 2
Phalangites (4Pk) x 12
Peltasts (4Ax) x 2
Thessalians (3Cv) x 2

Persia
Darius (CinC) in LCh x 1
Persian Horse (3Cv) x 5
Persian Nobles (3Kn) x 2
Persian Light Horse (LH) x 4
Mercenary Hoplites (4Sp) x 8
Persian Archers & Slingers (Ps) x 2
Persian Levy (7Hd) x 2

Both Macedonia & Persia each had one sub-general per the DBA 24 guidelines for command purposes. 

The armies are deployed, Persians on the left, Macedonia on the right. The playing area is 4' x 2.'


The Persian right flank.


The Macedonian right flank.


The Macedonian right flank advances towards the Persians in echelon.


A view from the Macedonian left.


The Macedonian advance continues. The Persian levy moves up to the end of the front line.


Alexander & the Companions are within striking distance of the Persian left flank.


Darius and his Noble bodyguard in reserve.


Alexander breaks through the Persian line, destroying a cavalry unit. The Persians have an opportunity to counterattack, which never came due to lack of pips.


The Persian right flank advancing.


Persian light horse attacking Macedonian peltasts.


Unable to counter due to lack of command points, the Macedonians launch a full assault on the Persian left.


The Macedonian assault on the Persian left is repulsed!


Alexander counters and another Persian cavalry is destroyed.


Meanwhile, the Persians are attempting to envelope the Macedonian left, where Macedonian General Parmenio is with the Thessalian cavalry.


The Macedonian phalangites are advancing towards the center of the Persian Mercenary hoplites.


The situation on the Macedonian left becomes critical as the Persian Skythian cavalry positions itself to flank the Thessalians. A Macedonian light horse unit guarding the flank has been destroyed.


The Persian Greek Mercenary Hoplites don't wait for the Macedonian phalanx to close, and launch an assault of their own.


A lack of command pips and indecisive combat results are preventing Alexander and the Macedonian right from results.


Alexander wheels left away from the Persian levy horde towards the Greek Mercenaries. The phalanx battle is indecisive. Darius and his nobles in reserve are not contributing much to the battle at this point.


The Persian levy is contained (destroying them does not contribute towards the number of destroyed enemy elements needed to win).


A Thessalian cavalry element is destroyed by Persian cavalry and flanking Skythians. Parmenio's element is now alone to defend the left flank. Note: The Persian light horse in the photo are in 2 ranks, as light horse get a bonus of +1 for a supporting rear rank of light horse.


The phalangites are closing with the main line of hoplites. The Hypaspists have lost an element, but are supported by Alexander. Destroyed Persian elements are at the top of the photo.


Destroyed Macedonians.


Parmenio and the remaining Thessalians manage to destroy a Persian cavalry element. They are still in harms way.


Parmenio turns to face the Skythians.


The Persians set-up their attack.


The Hypaspists turning the hoplite flank.


The Greek Peltasts have chased off som of the Persian light horse (above). The Persians are still positioning against Parmenio.


The Phalanx now applying pressure to the Hoplites.


Parmenio finally dies gloriously in battle.


However, more Mercenary Hoplites meet their end. Persian losses have reached 8, ending the battle.


The Persian Horde is still fighting on. Flanking cavalry doesn't help kill horde other than give a -1, since horde do not recoil in normal combat. Final score: Macedonia 8, Persia 5.
 

Assessment:

A hard fought game to the end. Because we only used one pip die for each side, we were forced to often concentrate on one flank at a time due to the lack of pips. Individual elements become expensive to move, while moving in groups is more cost effective.